Introduction
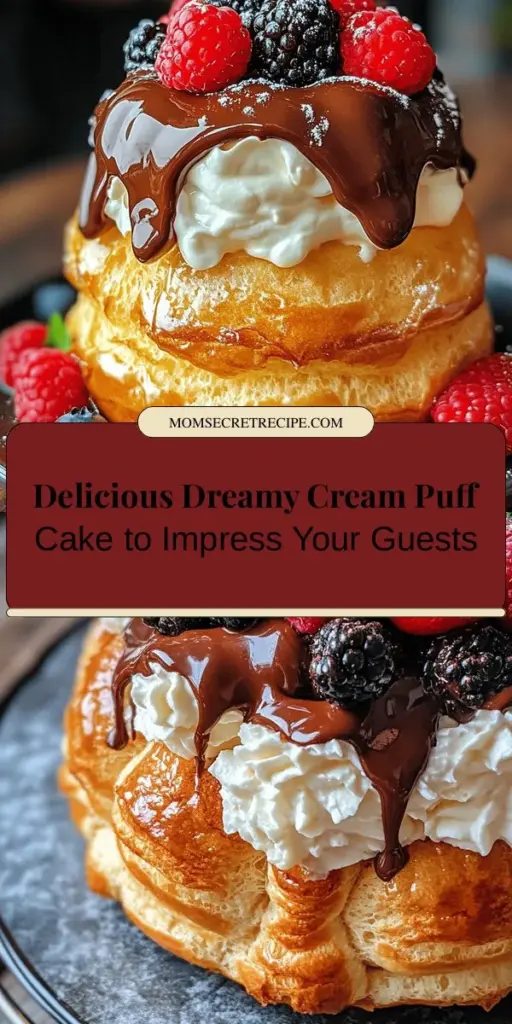
Cream puff desserts have long captivated the hearts and palates of dessert lovers around the world. The delicate combination of light, airy pastry and rich, creamy fillings creates a treat that is both satisfying and indulgent. Among the myriad of cream puff variations, the Dreamy Cream Puff Cake stands out as a stunning centerpiece for any occasion. This delightful dessert marries the classic cream puff with the elegance of a cake, resulting in a visually striking and deliciously rich experience.
What makes the Dreamy Cream Puff Cake particularly special is its seamless blend of textures and flavors. This cake features layers of choux pastry that puff beautifully in the oven, providing a light and crispy exterior. Inside, it’s filled with a luscious cream that melts in your mouth, creating an irresistible dessert that is perfect for celebrations or simply to satisfy a sweet tooth. The best part? This recipe is surprisingly easy to prepare, making it accessible even for novice bakers.
In this article, we will delve into the world of cream puffs, explore the intricacies of choux pastry, and guide you through the step-by-step preparation of the Dreamy Cream Puff Cake. Get ready to embark on a delicious journey that will leave your friends and family in awe of your baking skills.
Understanding Choux Pastry
Choux pastry, or pâte à choux, is a unique type of pastry dough that is essential for creating light and airy desserts like cream puffs, éclairs, and profiteroles. Unlike traditional doughs that rely on a leavening agent like yeast or baking powder, choux pastry is leavened through steam. As the pastry bakes, the moisture in the dough turns to steam, causing the pastry to puff up and create hollow centers. This characteristic is what allows choux pastry to be filled with cream, custard, or even savory mixtures.
The beauty of choux pastry lies in its simplicity, but achieving the perfect texture requires careful attention to the ingredients and their roles:
– Water: The foundation of choux pastry, water is vital for creating steam during baking. It also helps to dissolve the flour, ensuring a smooth dough.
– Unsalted Butter: This ingredient adds flavor and richness to the pastry while also contributing to its structure. The fat in the butter helps create a tender crumb, making the pastry melt in your mouth.
– All-Purpose Flour: Flour is essential for gluten development, which provides the structure needed to hold the pastry’s shape as it puffs. The right balance of flour ensures that the pastry is both sturdy and light.
– Eggs: Eggs are the key to achieving the lightness of choux pastry. They provide moisture, act as a binding agent, and contribute to the leavening process by creating steam as they cook.
– Salt: A small amount of salt enhances the flavor of the pastry, balancing the richness of the butter and eggs.
Beyond cream puffs, choux pastry is a versatile dough that can be used in a variety of sweet and savory dishes. From éclairs filled with chocolate pastry cream to savory cheese puffs, understanding how to work with choux pastry opens up a world of culinary possibilities.
Ingredients Breakdown
To create the Dreamy Cream Puff Cake, you will need a carefully selected list of ingredients that work harmoniously together. Here is a detailed breakdown of each component, focusing on how they contribute to the overall flavor and texture of the cake.
Choux Pastry Ingredients
1. Water: The backbone of your choux pastry, water is crucial for creating the right consistency in the dough. It ensures that the flour hydrates properly, leading to a smooth and elastic texture.
2. Unsalted Butter: Using unsalted butter allows you to control the saltiness of your pastry. The butter not only adds a rich flavor but also contributes to the tender, flaky texture that we seek in a perfect cream puff.
3. All-Purpose Flour: This ingredient provides the necessary structure to the pastry. The gluten formed during mixing will help the choux hold its shape while allowing it to puff nicely in the oven.
4. Eggs: Eggs are vital for the lightness of choux pastry. They act as a binder and provide moisture. As they cook, they create steam, which is essential for the pastry to puff up and develop its characteristic hollow center.
5. Salt: While it may seem like a minor addition, salt plays an important role in enhancing the overall flavor of the pastry. It balances the richness of the butter and adds depth to the taste.
Filling Ingredients
The filling of the Dreamy Cream Puff Cake is what takes it from ordinary to extraordinary. Here are the key ingredients that make up the luscious cream filling:
1. Heavy Whipping Cream: This ingredient is the star of your filling. Its high-fat content allows for a rich, creamy texture that will be both satisfying and indulgent. When whipped, it becomes light and airy, perfect for filling your cream puffs.
2. Powdered Sugar: For sweetness, powdered sugar is preferred as it dissolves easily in the cream, ensuring a smooth filling without any graininess.
3. Vanilla Extract: A splash of vanilla extract adds depth and warmth to the cream filling. It enhances the overall flavor profile and complements the richness of the heavy cream.
Topping Ingredients
To finish off your Dreamy Cream Puff Cake, you’ll want a delightful topping that adds both flavor and visual appeal:
1. Milk Chocolate Chips: These provide a rich, sweet flavor that pairs perfectly with the cream filling. The chocolate will be melted and drizzled over the top, creating a decadent finish.
2. Vegetable Oil: Adding a bit of vegetable oil to your melted chocolate helps achieve a smooth, glossy glaze that will adhere beautifully to the cake.
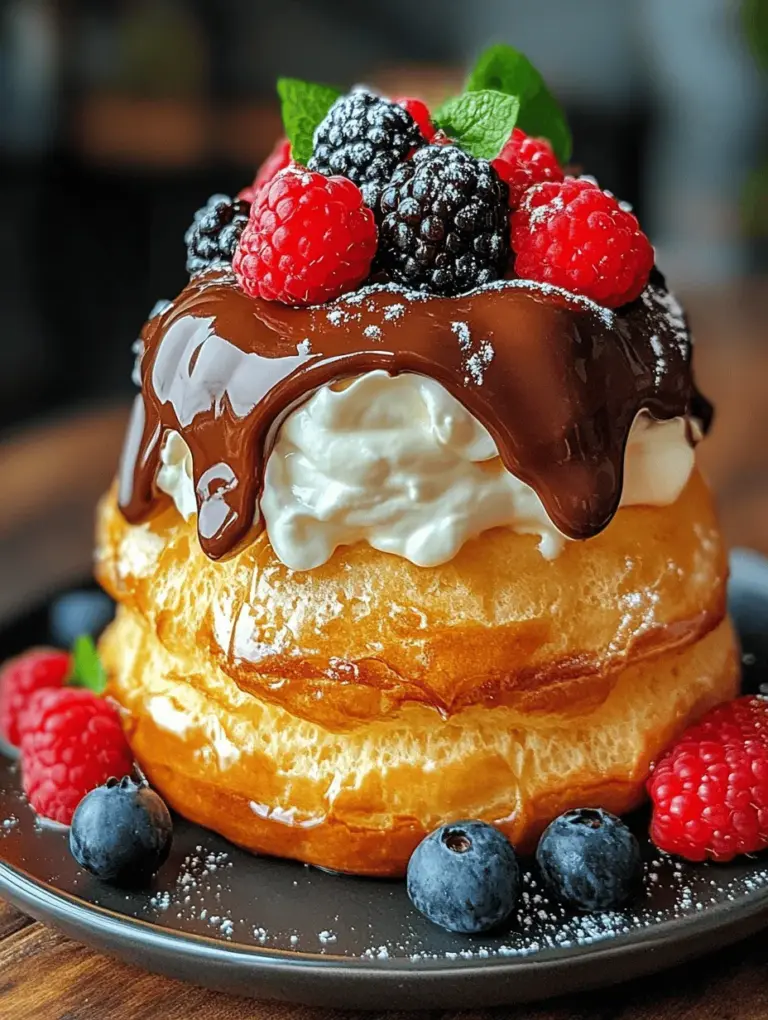
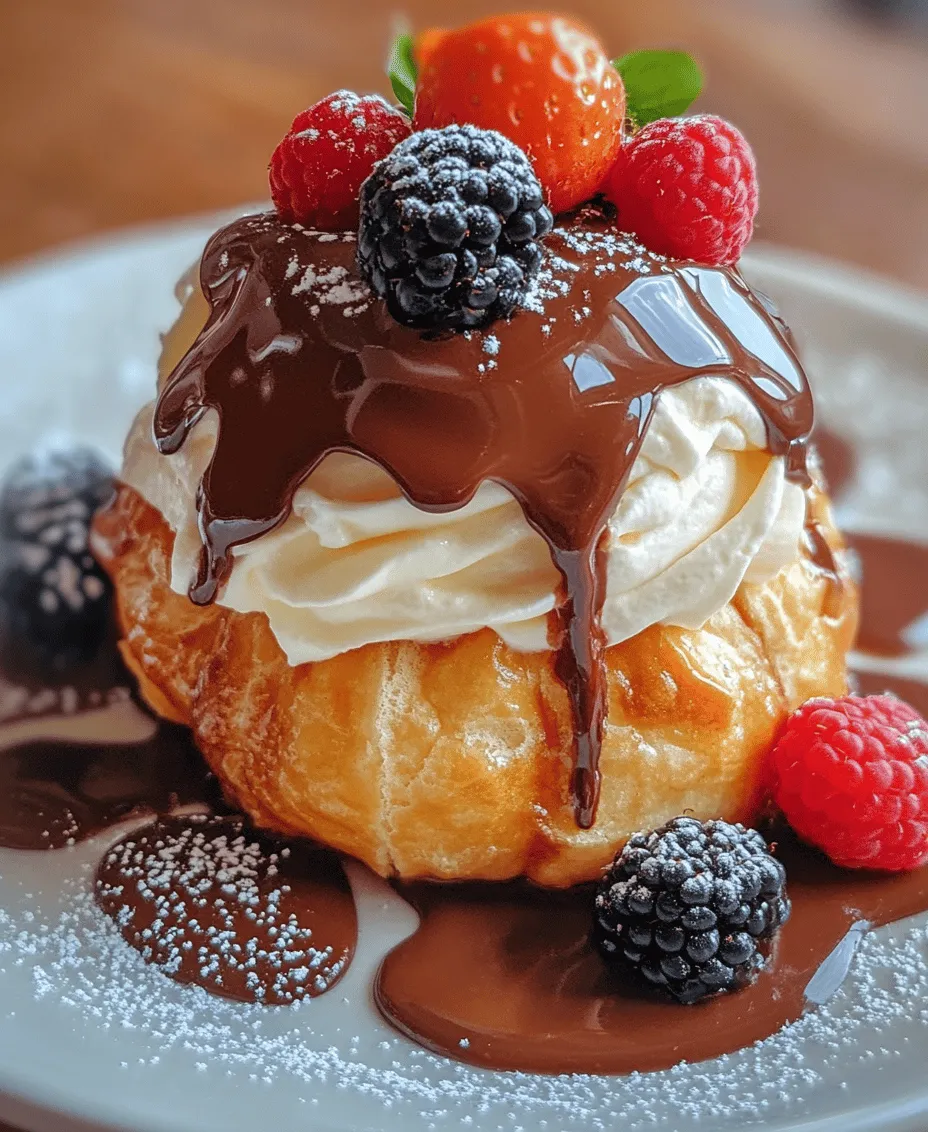
3. Optional Fresh Berries: For a touch of freshness and color, consider adding fresh berries as a topping. They not only enhance the presentation but also provide a delightful contrast to the richness of the cream and chocolate.
Step-by-Step Preparation Guide
Now that we’ve covered the ingredients, it’s time to dive into the preparation of the Dreamy Cream Puff Cake. The first step is to preheat your oven and prepare your baking environment.
Preheat and Prepare
Before you begin making the choux pastry, preheat your oven to 425°F (220°C). This high temperature is essential for achieving the initial puff of the pastry. Additionally, line a baking sheet with parchment paper to prevent sticking and ensure even baking.
Making the Choux Pastry
1. Combine Water and Butter: In a medium saucepan, combine the water and unsalted butter. Heat over medium heat until the butter melts completely and the mixture begins to simmer.
2. Add Flour: Once the mixture is simmering, remove it from the heat. Immediately add the all-purpose flour and salt, stirring vigorously with a wooden spoon until the dough comes together and forms a ball. This process should take about a minute.
3. Add Eggs: Allow the dough to cool slightly before adding the eggs. This step is crucial to prevent cooking the eggs in the hot dough. Once cooled, add the eggs one at a time, mixing thoroughly after each addition. The dough should become smooth and glossy.
4. Pipe the Pastry: Transfer the choux pastry to a piping bag fitted with a large round tip. Pipe small mounds of dough onto the prepared baking sheet, leaving space between each mound to allow for puffing.
5. Bake: Bake the choux pastry in the preheated oven for about 20-25 minutes, or until they are golden brown and puffed. Do not open the oven door during baking, as this may cause the pastries to deflate.
This is just the beginning of your Dreamy Cream Puff Cake journey. As you continue through the recipe, you’ll be building layers of flavor and texture that will culminate in a dessert that is truly unforgettable. Stay tuned for the next section, where we will explore the filling process and how to assemble this stunning cake!
Importance of Dough Consistency and Cooling Time
The consistency of the dough is critical in achieving the perfect Dreamy Cream Puff Cake. The dough should be smooth and glossy, with a thick enough texture to hold its shape when piped. This is crucial because the dough will puff up in the oven, creating the airy pockets that will eventually be filled with the luscious whipped cream.
After preparing the dough, it must cool adequately before adding the eggs. Cooling the dough helps prevent the eggs from cooking when introduced; the goal is to create a light, airy texture that will rise beautifully during baking. Allow the dough to cool for about 10-15 minutes in the mixing bowl or until it is warm but not hot to the touch.
Adding Eggs
Incorporating eggs into the cooled dough is a vital step that determines the structure and texture of your cake. Begin by adding the eggs one at a time, mixing thoroughly after each addition. This gradual process ensures that the eggs are fully integrated, contributing to the elasticity and rise of the dough.
The desired texture after adding the eggs should be smooth and slightly thicker than a pancake batter. You will know it’s ready when you can lift a spoonful of the dough, and it forms a peak that holds its shape without collapsing.
Shaping the Cake
Once your dough is prepared, it’s time to shape the cake. Using a piping bag fitted with a large round tip, fill the bag with the dough. Pipe out rounds of dough onto a parchment-lined baking sheet, ensuring they are evenly spaced apart.
For an even layer, try to keep the circles consistent in size—about 2 inches in diameter is ideal. The key is to apply even pressure while piping and to pull the bag straight up when finishing each puff to avoid any pointy tops. If you have a spatula, you can dip it in water and gently smooth out any peaks left behind after piping.
Baking the Cake
Preheat your oven to 400°F (200°C). Baking time for the Dreamy Cream Puff Cake is crucial to achieving that perfect puff. Bake the cake for about 25-30 minutes. You’ll know the cake is done when it has risen and turned a beautiful golden brown.
It’s essential not to open the oven door during the first 20 minutes of baking, as this can cause the cake to deflate. Instead, use the oven light to check on the progress. After 25 minutes, if the cake has risen and is golden, you can do a gentle tap on one of the puffs—if it sounds hollow, they are ready to come out of the oven.
Preparing the Whipped Filling
While the cake is baking, prepare the whipped filling. In a mixing bowl, combine heavy whipping cream, sugar, and vanilla extract. Using an electric mixer, whip the cream until soft peaks form. This means that when you lift the beater, the cream should hold its shape but still be soft enough to fold.
Be careful not to over-whip, as this can lead to grainy whipped cream. If desired, you can also fold in a bit of cream cheese or mascarpone cheese for added richness and flavor integration. This will enhance the overall taste of your filling while maintaining a light texture.
Assembling the Cake
Once the cake has cooled completely, it’s time to assemble it. Using a serrated knife, carefully slice each puff in half horizontally. Be sure to keep the tops and bottoms together to maintain the shape.
Next, take a piping bag filled with the whipped filling and pipe a generous dollop onto the bottom half of each puff. Aim for an even distribution, ensuring each puff is filled adequately without overflowing. Place the tops back on, pressing gently to secure them in place.
Making the Chocolate Topping
For the chocolate topping, melt high-quality chocolate in a microwave-safe bowl. Heat in short bursts of 30 seconds, stirring in between until completely melted and smooth. To achieve a glossy finish, you can add a teaspoon of vegetable oil to the melted chocolate. This will help create a beautiful sheen when poured over the assembled cake.
Once melted, let it cool slightly before drizzling over the top of your assembled cake. Allow the chocolate to set for a few minutes before serving.
Chilling and Serving
Chilling the cake in the refrigerator for at least 1 hour before serving is crucial for texture and flavor development. This allows the whipped filling to firm up slightly and meld with the cake, making every bite a delightful experience.
When ready to serve, slice the cake into individual portions. This dessert is rich, so a small slice goes a long way.
Flavor Pairing and Presentation Ideas
For an aesthetically pleasing presentation, consider garnishing the Dreamy Cream Puff Cake with fresh berries such as strawberries or raspberries, or a sprig of mint leaves. These not only add color but also a refreshing contrast to the richness of the cake.
Beverage pairings can elevate your dessert even further. Serve with a cup of coffee or a light herbal tea for a delightful afternoon treat. If you’re feeling adventurous, a scoop of vanilla ice cream on the side can add an extra layer of indulgence.
When presenting the cake, use a cake stand for height and elegance. Dusting the top with powdered sugar or drizzling some extra chocolate sauce can also enhance the visual appeal.
Nutritional Insights
While the Dreamy Cream Puff Cake is undeniably a treat, it’s essential to look at its nutritional aspects. A typical serving is rich in calories due to the cream and chocolate but can be enjoyed in moderation.
Consider portion sizes carefully. A slice measuring about 2 inches by 3 inches is sufficient for most occasions, allowing everyone to indulge without overdoing it.
For those seeking a healthier option, consider using reduced-fat cream cheese in the filling or substituting part of the heavy cream with Greek yogurt. This will add some protein while reducing overall fat content.
Conclusion
The Dreamy Cream Puff Cake is more than just a dessert; it’s a show-stopping centerpiece for any occasion. With its light, airy puffs filled with lush whipped cream and topped with a glossy chocolate finish, this cake is sure to impress friends and family alike.
Whether you are celebrating a special occasion or simply want to treat yourself, making this cake is a rewarding experience that brings joy not only in the creation but also in the enjoyment of sharing it with others.
Don’t hesitate to give it a try! With its delightful flavors and elegant presentation, the Dreamy Cream Puff Cake is bound to become a favorite in your recipe repertoire. Enjoy the process of baking and the pleasure of sharing your homemade treats with loved ones.
