When it comes to desserts that captivate the senses, few can compete with the elegance and flavor of Mini Espresso Cheesecakes. This decadent treat combines the rich, creamy texture of traditional cheesecake with the bold, invigorating essence of espresso, creating a harmonious balance that is sure to please coffee aficionados and dessert lovers alike. Whether you’re hosting a dinner party, celebrating a special occasion, or simply treating yourself to something sweet, these mini cheesecakes are an exquisite choice that will elevate any dessert table.
The Allure of Mini Espresso Cheesecakes
Mini Espresso Cheesecakes offer a delightful twist on the classic cheesecake, infusing each bite with a robust coffee flavor that tantalizes the palate. The inspiration for these mini delights comes from the growing trend of coffee-infused desserts, which have gained popularity due to their ability to satisfy cravings for both sweets and caffeine. With their individual serving sizes, these cheesecakes are not only visually appealing but also practical, allowing guests to indulge without the need for slicing and serving a larger cake.
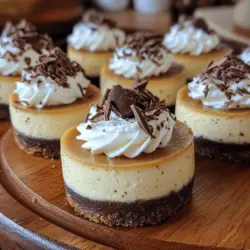
The combination of a buttery graham cracker crust, a smooth and creamy filling, and a topping of whipped cream and dark chocolate shavings makes these mini cheesecakes an irresistible dessert. Each component plays a significant role in crafting the perfect balance of flavors and textures, ensuring that every bite is an experience to savor.
Understanding the Ingredients
Creating the perfect Mini Espresso Cheesecakes begins with understanding the essential ingredients that contribute to their deliciousness. Each component is not only vital to the overall flavor profile but also impacts the texture and presentation of the final product.
The Essential Components of Mini Espresso Cheesecakes
Overview of the Importance of Each Ingredient
To achieve the ideal cheesecake, it is crucial to select high-quality ingredients. The combination of cream cheese, sour cream, and espresso powder creates a rich filling, while the graham cracker crust provides a satisfying crunch. Each ingredient plays a distinct role in ensuring that the finished product is both delectable and visually appealing.
The Role of Graham Cracker Crust
The graham cracker crust serves as the foundation of the Mini Espresso Cheesecakes, providing a buttery and slightly sweet base that contrasts beautifully with the creamy filling. To create the crust, crushed graham crackers are combined with melted butter and a touch of sugar. This mixture is then pressed into the bottom of the mini cheesecake pans, ensuring a sturdy structure that holds the filling in place.
Cream Cheese: The Heart of Cheesecake
Cream cheese is the star ingredient in any cheesecake, and Mini Espresso Cheesecakes are no exception. The creamy, tangy flavor of the cheese creates a luscious filling that is smooth and velvety. When selecting cream cheese, opt for full-fat varieties, as they yield the richest flavor and texture. It’s important to ensure that the cream cheese is at room temperature before mixing to prevent lumps and achieve a seamless consistency.
The Influence of Espresso Powder
Espresso powder is the key ingredient that sets these cheesecakes apart. It adds a deep, rich coffee flavor that enhances the overall taste of the dessert. When choosing espresso powder, look for high-quality options that are finely ground to ensure even distribution throughout the cheesecake filling. The intensity of the espresso can be adjusted according to personal preference, allowing you to customize the flavor profile to your liking.
Enhancing Flavor with Sour Cream and Vanilla Extract
Sour cream is another essential ingredient that contributes to the creaminess of the filling while adding a subtle tanginess that balances the sweetness. The addition of vanilla extract complements the flavors of the cream cheese and espresso, rounding out the overall taste and enhancing the dessert’s aroma. Using pure vanilla extract, rather than imitation, will provide a more authentic and vibrant flavor.
Preparation Steps for Mini Espresso Cheesecakes
Now that we’ve explored the essential ingredients, it’s time to dive into the preparation steps for creating these delightful Mini Espresso Cheesecakes. Following a systematic approach will ensure that each component is perfectly crafted, resulting in a delicious final product.
Creating the Perfect Cheesecake Base
Preheating the Oven: The Importance of Temperature Control
Before beginning the preparation of the cheesecakes, it’s crucial to preheat your oven to the appropriate temperature. Most cheesecake recipes call for a baking temperature of around 325°F (163°C). Proper temperature control is essential for even baking and achieving a creamy texture.
Crafting the Graham Cracker Crust
To make the graham cracker crust, start by finely crushing the graham crackers. This can be done using a food processor for a quick and even texture or by placing the crackers in a resealable plastic bag and crushing them with a rolling pin. Once you have the desired crumb consistency, transfer the crushed graham crackers to a mixing bowl.
Next, melt the butter (unsalted is preferred) and combine it with the crushed graham crackers and a bit of sugar. The sugar adds sweetness to the crust, enhancing the overall flavor of the cheesecake. Mix until the crumbs are fully coated in butter and have a texture similar to wet sand.
Pressing the Crust: Tips for an Even Layer
Once the crust mixture is ready, it’s time to press it into the mini cheesecake pans. Use a measuring cup or the bottom of a glass to firmly and evenly press the crust mixture into the bottom of each pan. Ensure that the crust is packed tightly to create a stable base for the filling. Aim for an even layer across all the pans to achieve consistent baking results.
Preparing the Cheesecake Filling
With the crust in place, it’s time to prepare the creamy filling. In a mixing bowl, beat the softened cream cheese until smooth and creamy. This should take about 2-3 minutes using an electric mixer. Scrape down the sides of the bowl as needed to ensure all the cream cheese is fully incorporated.
Next, add the sour cream, sugar, vanilla extract, and espresso powder to the cream cheese. Beat the mixture on medium speed until everything is well blended and the filling is free of lumps. This step is crucial for achieving a smooth and creamy cheesecake filling.
Achieving the Right Creamy Consistency
The final step in preparing the filling is to incorporate eggs. Add the eggs one at a time, mixing on low speed until just combined. Be careful not to overmix at this stage, as this can introduce excess air into the batter, leading to cracks during baking.
Once the filling is ready, carefully spoon it into the prepared graham cracker crusts, filling each mini cheesecake pan nearly to the top. Smooth out the surface with a spatula to ensure an even bake.
By following these initial steps, you’re well on your way to creating Mini Espresso Cheesecakes that will impress your family and friends. In the next part of this article, we will delve into the baking process, cooling techniques, and finishing touches that will elevate these mini treats to perfection. Stay tuned for more tips on how to achieve the best results with your Mini Espresso Cheesecakes!

Incorporating Espresso: Balancing Flavor
When making Mini Espresso Cheesecakes, the key to a delightful flavor profile lies in the careful incorporation of espresso. The rich, robust flavor of espresso should complement the creamy texture of the cheesecake without overwhelming it. To achieve this balance, start by preparing your espresso using high-quality coffee beans. Freshly brewed espresso offers a depth of flavor that instant coffee cannot replicate.
Once your espresso is ready, allow it to cool slightly before adding it to the cheesecake mixture. This step is crucial; adding hot espresso directly can alter the texture of your filling. When mixing, aim for a smooth consistency by blending the espresso thoroughly with the cream cheese and sugar. For the best results, consider using an electric mixer on medium speed to ensure that your ingredients are well integrated. Taste the mixture before pouring it into the muffin tin—this is your opportunity to adjust the sweetness or espresso intensity according to your preferences.
Baking the Mini Cheesecakes
Techniques for Perfectly Baked Cheesecakes
Baking mini cheesecakes requires precision and attention to detail. Start by preheating your oven to a consistent 325°F (160°C). This temperature is ideal for baking cheesecakes, allowing them to set without cracking. Before you begin filling your muffin tin, make sure it is properly prepared. Lining the cups with muffin liners or lightly greasing them will help with easy removal after baking.
Filling the Muffin Tin: Avoiding Spills
When it comes to filling the muffin tin, a few techniques can help you avoid spills. Use a ladle or a measuring cup to pour the cheesecake batter into each cup, filling them about three-quarters full. This allows enough room for the cheesecakes to rise without overflowing. If you’re concerned about mess, consider placing the muffin tin on a baking sheet before filling, which will catch any potential drips during the baking process.
Baking Time and Temperature: Knowing When It’s Done
Baking time is crucial for achieving the perfect texture. Mini cheesecakes typically bake for 15 to 20 minutes, but the exact time can vary depending on your oven. Keep an eye on them during the last few minutes of baking. You’ll know they are done when the edges are set, but the centers still have a slight jiggle. This jiggle is normal and indicates that they will firm up as they cool.
The Importance of Gradual Cooling
Once baked, turn off the oven and crack the door open slightly. Allow the cheesecakes to cool in the oven for about 5-10 minutes before transferring them to a wire rack. This gradual cooling process helps prevent cracks from forming on the surface. Once they reach room temperature, they can be transferred to the refrigerator to chill completely.
Chilling and Serving Your Cheesecakes
Final Touches for a Memorable Dessert Experience
The chilling phase is essential for the texture and flavor of your Mini Espresso Cheesecakes. The cheesecake needs time to set and develop its flavors fully.
Cooling to Room Temperature: Why It Matters
Letting your cheesecakes cool to room temperature before refrigeration is important. This step prevents condensation from forming on the surface, which can lead to a soggy texture. Room temperature cooling also allows the flavors to meld together more effectively, enhancing the overall taste of the dessert.
Refrigeration: The Key to Perfect Texture
After cooling, cover the cheesecakes with plastic wrap or aluminum foil and refrigerate them for at least 4 hours, but overnight is ideal. This chilling time allows the cheesecakes to firm up, giving them the luscious texture that makes them so appealing. The cold temperature also intensifies the espresso flavor, making each bite a delightful experience.
Serving Suggestions: Enhancing Presentation with Whipped Cream and Dark Chocolate Shavings
When it comes time to serve your Mini Espresso Cheesecakes, presentation is key. Consider garnishing each cheesecake with a dollop of freshly whipped cream on top, adding a touch of elegance and creaminess. Dark chocolate shavings or curls sprinkled on top create a beautiful contrast and provide an extra layer of flavor that pairs wonderfully with the espresso. For a touch of sophistication, you can even drizzle a little chocolate sauce or caramel over the top before serving.
For the ultimate coffee experience, serve these cheesecakes alongside a shot of espresso or a cup of your favorite coffee. This pairing not only complements the dessert but also enhances the coffee experience for your guests.
Flavor Variations and Customizations
Exploring Creative Twists on the Classic Recipe
While the Mini Espresso Cheesecakes are delicious as they are, there are numerous ways to customize the recipe to fit different tastes and dietary needs.
Alternative Flavor Additions: Caramel or Hazelnut
For those who enjoy experimenting with flavors, consider adding caramel or hazelnut extracts to the cheesecake batter. Swirling in some caramel sauce before baking can create a delightful marbled effect and add a rich, sweet contrast to the espresso. Alternatively, incorporating hazelnut spread or flavoring can give your cheesecakes a delightful nutty twist that complements the coffee beautifully.
Substitutions for Dietary Restrictions: Gluten-Free and Vegan Options
If you’re hosting guests with dietary restrictions, you can easily adapt this recipe. For a gluten-free version, simply substitute regular graham cracker crumbs with gluten-free ones. You can also use almond flour or crushed gluten-free cookies as a base.
For a vegan option, replace the cream cheese with a vegan cream cheese alternative and use a flaxseed egg or a thickener like cornstarch to achieve the right consistency. You can also substitute regular sugar with coconut sugar or a natural sweetener of your choice. Keep in mind that the espresso used should also be dairy-free.
These substitutions allow everyone to enjoy the indulgent experience of Mini Espresso Cheesecakes without compromising on flavor or texture.
Conclusion
Mini Espresso Cheesecakes are a delightful dessert that combines the rich flavors of cheesecake with the invigorating essence of espresso. This recipe not only satisfies your sweet tooth but also provides a unique coffee-infused experience that is sure to impress your guests. With simple ingredients and straightforward instructions, you can create these mini treats that are perfect for any gathering or a personal indulgence.
The process of making these decadent cheesecakes is enjoyable and rewarding. From carefully incorporating espresso to mastering the baking and chilling techniques, each step enhances the final product. With the addition of creative variations, you can make these cheesecakes your own, catering to different tastes and dietary needs.
Next time you’re in the mood for a sweet treat, consider making Mini Espresso Cheesecakes. Enjoy the process, share them with friends, and savor each bite of your delicious creation.