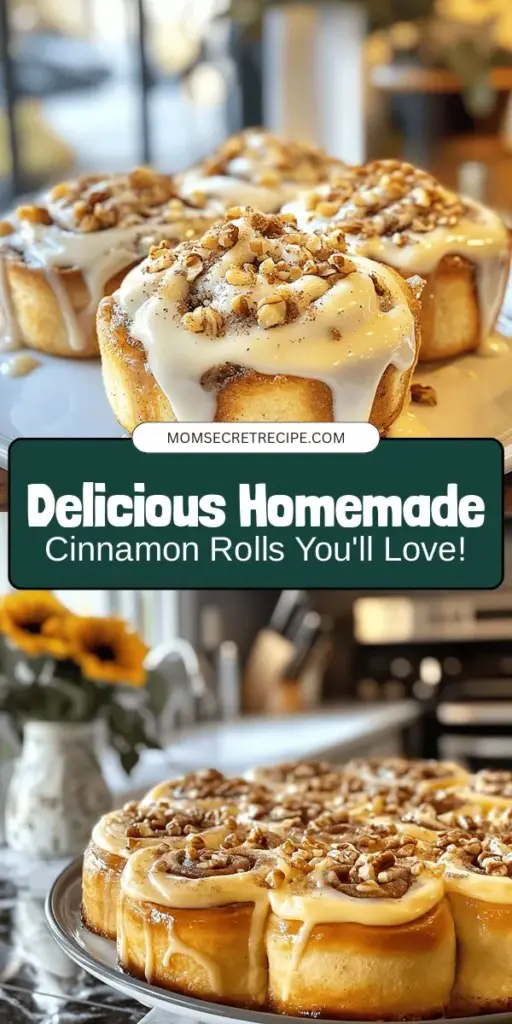
Introduction
Cinnamon rolls have long been a beloved treat for breakfast and dessert, known for their irresistible aroma and melt-in-your-mouth texture. The soft, fluffy spirals swirled with rich cinnamon sugar and topped with creamy icing evoke feelings of warmth and nostalgia, making them a favorite across generations. Whether enjoyed on a lazy Sunday morning or served at festive gatherings, these delightful pastries bring a sense of comfort and joy that few other baked goods can match.
There’s something magical about the experience of making cinnamon rolls from scratch. The process of transforming simple ingredients into a warm, gooey treat is not only satisfying but also fosters a sense of togetherness. Sharing homemade cinnamon rolls with family and friends creates lasting memories, making them a staple for gatherings and special occasions. In this article, we’ll guide you through the steps of creating your very own heavenly cinnamon rolls that are soft, fluffy, and decadently sweet.
The Allure of Homemade Cinnamon Rolls
The history of cinnamon rolls dates back centuries, with origins rooted in various baking traditions around the world. From the Swedish kanelbullar to the German Zimtschnecken, variations of this beloved pastry can be found in many cultures. Each version offers its unique twist on flavor and preparation, but they all share common elements that highlight the joy of baking.
Baking cinnamon rolls is a sensory experience that engages all the senses. The moment you mix the dough, the sweet scent of cinnamon wafts through the air, building anticipation for the deliciousness to come. As the dough rises, you can feel its texture transform, becoming soft and pliable. Once baked, the golden-brown rolls emerge from the oven, their tantalizing aroma filling the kitchen and inviting everyone to gather around. The combination of flavors—sweet, buttery, and spicy—creates a comforting treat that is often associated with home and hearth.
While store-bought cinnamon rolls may offer convenience, they often lack the depth of flavor and texture that homemade versions provide. Homemade cinnamon rolls allow for customization, enabling bakers to adjust the sweetness, spice level, and icing to their preference. The satisfaction of pulling a warm batch of cinnamon rolls from the oven, knowing they were made with care and love, is truly unparalleled.
Understanding the Ingredients
To create heavenly cinnamon rolls, it’s essential to understand the role of each ingredient in the recipe. Here’s a breakdown of the key components that contribute to the deliciousness of these treats:
– All-Purpose Flour: The foundation of the dough, all-purpose flour provides the necessary structure. Its gluten content helps the dough rise and maintain its shape, resulting in soft, fluffy rolls.
– Active Dry Yeast: This is the magic ingredient that allows the dough to rise. Yeast ferments and produces carbon dioxide, creating air pockets that give the rolls their lightness. Proper activation of the yeast is crucial for achieving the desired texture.
– Sugar Types (Granulated and Brown): Sugar not only sweetens the rolls but also enhances flavor and moisture. Granulated sugar is typically used in the dough, while brown sugar adds depth and richness to the cinnamon filling.
– Butter: Butter contributes richness, moisture, and flavor to the dough. It also helps create a tender texture, making each bite a delight.
– Eggs: Eggs enrich the dough and aid in leavening. They also contribute to the overall flavor and color of the cinnamon rolls.
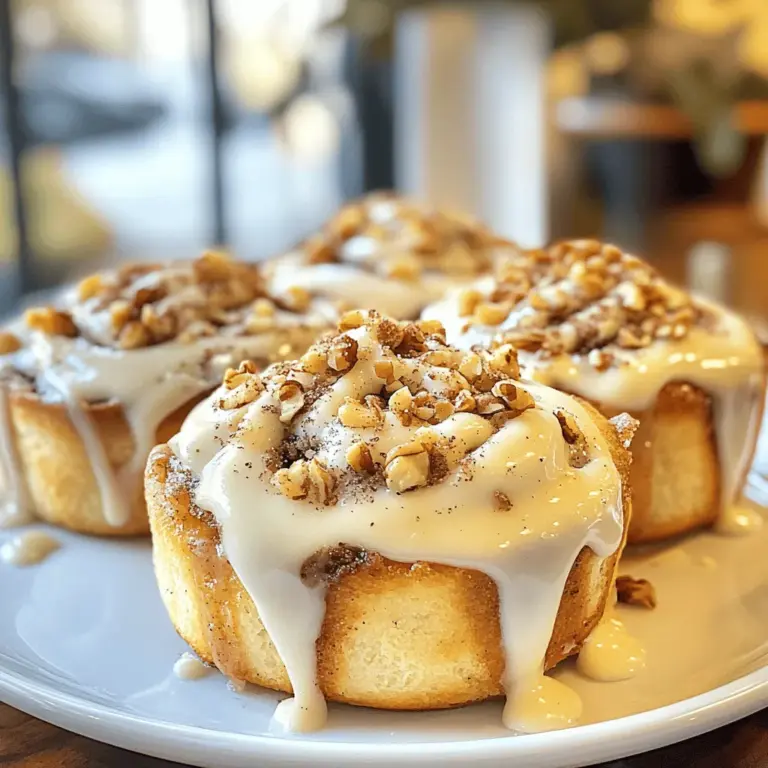
– Optional Ingredients: For those who want to elevate their cinnamon rolls, consider adding chopped nuts or raisins. Walnuts or pecans can add a delightful crunch, while raisins bring a touch of sweetness and chewiness.
Step-by-Step Guide to Making Heavenly Cinnamon Rolls
Activating the Yeast
The first step in creating fluffy cinnamon rolls is to activate the yeast. This process is essential for ensuring the dough rises properly. Start by measuring out warm water (between 100°F to 110°F) and adding it to a mixing bowl. Sprinkle the active dry yeast over the water, along with a teaspoon of sugar to feed the yeast. Allow the mixture to sit for about 5 to 10 minutes until it becomes frothy. This indicates that the yeast is alive and ready to work its magic.
Making the Dough
Once the yeast is activated, it’s time to make the dough. In a large mixing bowl, combine the activated yeast mixture with the remaining sugar, melted butter, eggs, and a pinch of salt. Gradually add the all-purpose flour, mixing until a shaggy dough forms. At this point, you can switch to using a stand mixer fitted with a dough hook for ease, or continue mixing by hand. The goal is to incorporate the ingredients until they are well combined but not overly worked.
Kneading the Dough
Kneading is a crucial step in developing the gluten structure of the dough, which contributes to the roll’s texture. If you’re using a stand mixer, knead the dough on a low speed for about 5 to 7 minutes, or until it is smooth and elastic. If kneading by hand, turn the dough out onto a lightly floured surface and knead for about 8 to 10 minutes, adding flour as necessary to prevent sticking. The dough is ready when it springs back to the touch and feels elastic.
After kneading, place the dough in a lightly greased bowl, cover it with a clean kitchen towel, and let it rise in a warm environment until it has doubled in size. This typically takes about 1 to 2 hours, depending on the temperature of your kitchen. The anticipation of watching the dough rise is part of the joy of baking, as it signals that delicious cinnamon rolls are on the horizon.
—
In the next part of this article, we will continue with the remaining steps of making heavenly cinnamon rolls, including preparing the cinnamon filling, shaping the rolls, and baking them to perfection. Stay tuned for more tips and tricks to ensure your homemade cinnamon rolls are a delightful success!

Preparing the Filling
To create the perfect cinnamon rolls, the filling is a crucial component that elevates the flavor to heavenly heights. For the filling, you will need a simple yet delightful cinnamon-sugar blend. Start with 1 cup of packed brown sugar and mix in 2 tablespoons of ground cinnamon. This combination not only adds sweetness but also infuses the rolls with that warm, comforting cinnamon flavor we all adore. For an added dimension of flavor, consider mixing in a pinch of nutmeg or a sprinkle of vanilla extract.
Once your cinnamon-sugar blend is ready, set it aside. This mixture is essential for providing that rich, sweet, and slightly spicy flavor that complements the dough perfectly.
Rolling Out the Dough
After allowing your dough to rise, it’s time to roll it out. This step is key to achieving the right thickness and rectangular shape for rolling. Begin by generously flouring your work surface to prevent sticking and place the dough in the center. Using a rolling pin, gently roll the dough out into a rectangle approximately 16 inches long and 12 inches wide, ensuring the dough is around 1/4 inch thick.
To help maintain the rectangle shape, start from the center and roll outward, adjusting the corners as necessary. If the dough resists rolling out, give it a few minutes to rest; this will relax the gluten and make it easier to work with.
Adding the Filling
With the dough rolled out to the desired shape, it’s time to add the cinnamon-sugar filling. Start by spreading 1/2 cup of softened butter evenly across the surface of the dough, leaving a small border around the edges. This layer of butter helps the filling adhere and adds richness to the rolls.
Next, sprinkle the cinnamon-sugar mixture evenly over the buttered dough. For an additional texture option, consider adding chopped nuts, such as pecans or walnuts, or even raisins or chocolate chips for a sweet twist. The key here is to ensure an even distribution of the filling so that every bite of your cinnamon rolls is filled with delicious flavor.
Forming the Rolls
Once the filling is added, it’s time to roll up the dough into a log. Starting from one long edge, carefully roll the dough away from you, keeping it as tight as possible without tearing. The tighter you roll, the better the shape and rise will be. Once you reach the other edge, pinch the seam to seal it.
After you have formed the log, use a sharp knife or a piece of dental floss to cut the log into 12 equal portions. This method allows for cleaner cuts without squishing the rolls. Place the cut rolls in a greased baking dish, ensuring they are spaced evenly to allow for expansion during the second rise.
Second Rise
The second rise is a crucial step that should not be overlooked. After placing the rolls in the baking dish, cover them with a clean kitchen towel and let them rise in a warm environment for about 30 to 45 minutes, or until they have doubled in size. This step is essential for achieving that fluffy, airy texture that makes cinnamon rolls so delightful. During this time, the yeast will work its magic, creating air pockets that will result in light and tender rolls.
Baking
Once the rolls have completed their second rise, it’s time to bake them to perfection. Preheat your oven to 350°F (175°C). Bake the rolls for 25 to 30 minutes, or until they are golden-brown and cooked through. To ensure even baking, rotate the baking dish halfway through. Keep an eye on them towards the end of the baking time; you want the tops to be a beautiful golden hue without becoming too dark.
When the rolls are done, remove them from the oven and allow them to cool slightly in the pan. This brief cooling period will make it easier to apply the frosting without it melting away.
Creating the Perfect Frosting
To complement your heavenly cinnamon rolls, you need an equally heavenly frosting. For the frosting, gather the following ingredients: 8 oz of cream cheese (softened), 1/4 cup of unsalted butter (softened), 2 cups of powdered sugar, and 1 teaspoon of vanilla extract.
In a mixing bowl, combine the cream cheese and butter, blending them together until smooth and creamy. Gradually add in the powdered sugar, mixing well until fully incorporated. Finally, stir in the vanilla extract, which adds a lovely depth of flavor.
Techniques for Achieving the Right Consistency and Smoothness
The key to achieving the right consistency for your frosting is to add the powdered sugar gradually. This allows you to control the thickness; if the frosting is too thick, you can mix in a tablespoon of milk to achieve your desired smoothness. If it’s too thin, simply add a little more powdered sugar until it’s spreadable yet still thick enough to hold its shape.
The Significance of Frosting Application and Its Timing
Timing is everything when it comes to frosting your cinnamon rolls. Allow the rolls to cool for about 10 to 15 minutes after baking. This will ensure that the frosting doesn’t melt away into a puddle. Once cooled, generously spread the frosting over the warm rolls, allowing it to melt slightly into the crevices, creating a luscious, gooey topping that perfectly complements the warm cinnamon rolls.
Serving and Enjoying Your Heavenly Cinnamon Rolls
Presentation is key when serving your heavenly cinnamon rolls. Arrange them in a beautiful dish, and consider dusting a little extra powdered sugar on top for a finishing touch. You can also garnish with a sprinkle of cinnamon or a few chopped nuts for added texture and flair.
When it comes to pairing your cinnamon rolls with beverages, consider classic options like freshly brewed coffee, herbal tea, or a glass of cold milk. The warmth and sweetness of the rolls paired with these drinks create a comforting experience perfect for breakfast or an afternoon treat.
The Joy of Sharing Homemade Treats
One of the greatest joys of baking is sharing your creations with family and friends. Invite loved ones to join you in enjoying these homemade treats. You can serve the rolls straight from the oven for a delightful family breakfast or package some as gifts for neighbors or friends. Homemade cinnamon rolls are sure to bring smiles and create cherished memories around the table.
Common Variations to Try
While the classic cinnamon roll is undoubtedly delicious, don’t hesitate to explore different flavor profiles. For a seasonal twist, try adding pumpkin spice to the filling for a fall-inspired treat. Alternatively, for chocolate lovers, consider adding cocoa powder to the dough or filling, or even chocolate chips for an indulgent variation.
If you or someone you know has gluten sensitivities, adapting the recipe for gluten-free needs is also possible. Use gluten-free all-purpose flour and ensure that all other ingredients are gluten-free. This way, everyone can enjoy the sweetness of homemade cinnamon rolls.
Creative Toppings
Experimenting with flavored frostings or glazes can take your cinnamon rolls to the next level. Consider a maple glaze made with maple syrup and powdered sugar for a sweet, nutty flavor. You can also try adding citrus zest to the frosting for a refreshing twist.
Conclusion
Making homemade heavenly cinnamon rolls is a delightful experience that combines the joy of baking with the satisfaction of sharing delicious treats. The process, from preparing the dough to adding the perfect frosting, allows you to navigate through culinary creativity and craftsmanship.
Whether you choose to stick with the classic recipe or explore various flavor profiles and toppings, the joy of creating and sharing these cinnamon rolls is unparalleled. We encourage you to try this recipe, savor the process, and share the delicious results with your loved ones. There’s something timeless about cinnamon rolls that evokes warmth, comfort, and cherished memories, making them a beloved treat for generations to come.
