Introduction
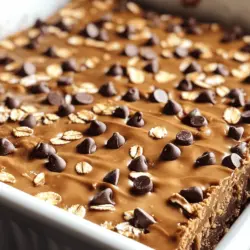
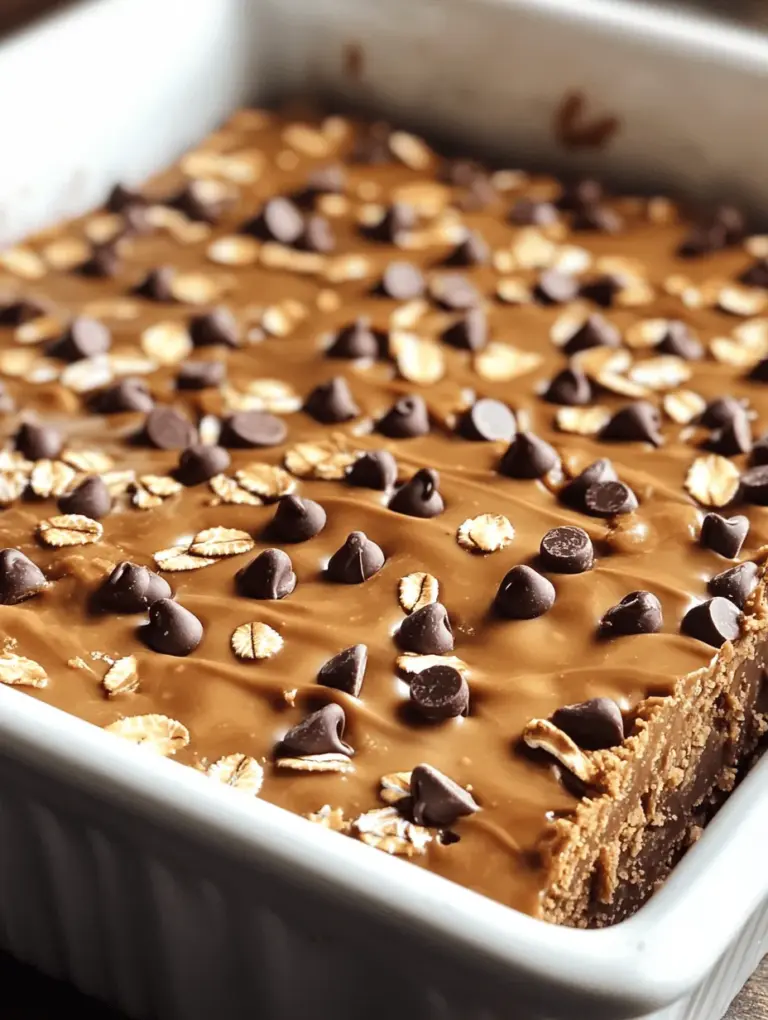
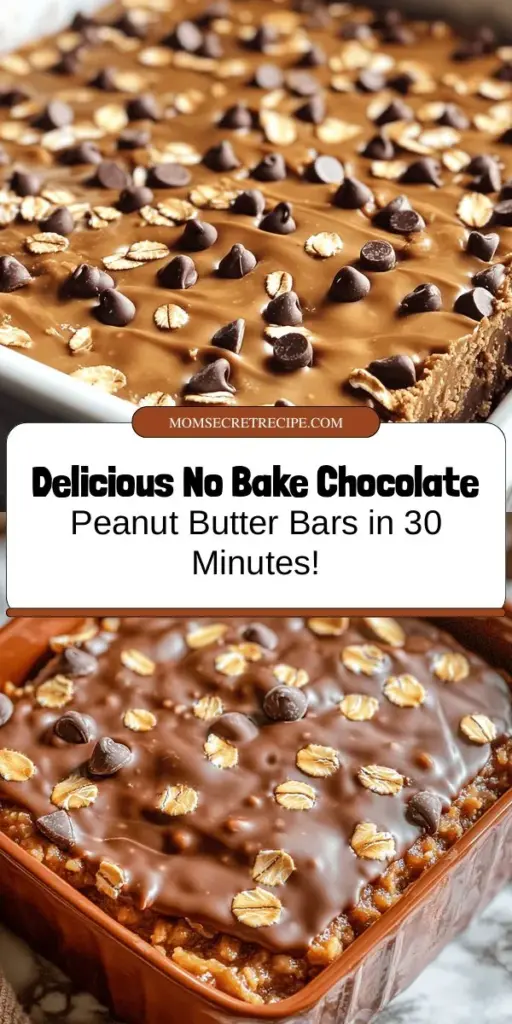
In the realm of desserts, no-bake treats have surged in popularity, becoming favorites among both novice and experienced bakers alike. The allure of no-bake desserts lies in their simplicity—delicious, satisfying, and often healthier options that require minimal preparation and no oven time. One standout recipe in this category is the No Bake Chocolate Peanut Butter Bars. These bars combine the rich, nutty flavor of peanut butter with the indulgent taste of chocolate, creating a delectable treat that is both satisfying and nutritious.
What makes these Chocolate Peanut Butter Bars particularly appealing is their ease of preparation. With just a handful of ingredients, you can whip up a batch in less than 30 minutes. There’s no need to worry about baking times or temperatures; simply mix, chill, and enjoy. Whether you’re looking for a quick snack, a healthy dessert for the family, or a satisfying treat to satisfy your sweet tooth, these bars have you covered.
The Allure of No-Bake Desserts
No-bake desserts are exactly what they sound like—delicious sweet treats that require no baking! These recipes are perfect for those hot summer days when turning on the oven feels like a daunting task. But beyond just being a seasonal convenience, no-bake desserts come with a plethora of benefits that make them a go-to choice for many home cooks.
One of the primary advantages of no-bake desserts is their quick preparation time. Many no-bake recipes can be prepared in under 30 minutes, allowing you to satisfy your cravings without spending hours in the kitchen. This is especially beneficial for busy individuals or parents looking to whip up something special without the fuss.
Cleanup is another significant perk of no-bake desserts. Unlike traditional baked goods that often require multiple mixing bowls, baking sheets, and pans, no-bake recipes typically involve fewer dishes. Most of the mixing can be done in one bowl, and you can often use the same container for both preparation and storage. This simplicity is a major draw for anyone who wants to enjoy delicious homemade treats without the hassle of extensive cleanup.
Additionally, no-bake desserts are incredibly versatile. You can easily customize these recipes to suit your taste preferences or dietary needs. From swapping out ingredients to making adjustments for allergies, the possibilities are nearly endless. Whether you prefer vegan options, gluten-free alternatives, or simply want to experiment with different flavors, no-bake recipes allow for creativity and personalization.
Ingredients Breakdown
Before diving into the preparation of these delightful No Bake Chocolate Peanut Butter Bars, it’s essential to understand the key ingredients and their health benefits. Each component plays a vital role not only in the flavor and texture of the bars but also in their nutritional profile.
Creamy Peanut Butter
Peanut butter is the star ingredient in these bars, offering a rich, nutty flavor and a creamy texture. It’s packed with protein and healthy fats, making it an excellent source of energy. The natural fats found in peanut butter can help keep you feeling fuller for longer, making these bars a satisfying snack choice.
Coconut Oil
Coconut oil is another essential ingredient in this recipe, contributing to the bars’ smooth consistency and enhancing the flavor. Rich in medium-chain triglycerides (MCTs), coconut oil can provide a quick source of energy. MCTs are also known for their potential health benefits, including improved metabolism and brain function.
Honey or Maple Syrup
To sweeten the bars, you can use either honey or maple syrup. Both are natural sweeteners that offer a better alternative to refined sugars. Honey is known for its antibacterial properties and has a lower glycemic index than many processed sweeteners, making it a healthier option for those concerned about blood sugar levels. Maple syrup also contains antioxidants and essential minerals, adding to the nutritional value of the bars.
Gluten-Free Oats
Oats provide the structural base for these bars and add a chewy texture. They are an excellent source of dietary fiber, which can aid in digestion and promote a feeling of fullness. Additionally, gluten-free oats are perfect for those with gluten sensitivities or celiac disease, making these bars an inclusive treat for all.
Almond Flour
Almond flour is used in this recipe as a nutritious alternative to traditional flour. It is low in carbohydrates and high in healthy fats, making it a popular choice for those following a low-carb or ketogenic diet. Almond flour is also rich in vitamin E, an antioxidant that helps protect the body from oxidative stress.
Cocoa Powder
Cocoa powder is what gives these bars their rich chocolate flavor. It is packed with antioxidants and has been linked to various health benefits, including improved heart health and enhanced mood. Using unsweetened cocoa powder allows you to control the sweetness of the bars while still enjoying that deep chocolate taste.
Dark Chocolate Chips
Finally, dark chocolate chips add a decadent finish to these bars. When choosing chocolate, opt for high-quality dark chocolate with a cocoa content of 70% or higher. Dark chocolate is lower in sugar than milk chocolate and is also rich in antioxidants. It can also provide a boost of serotonin, enhancing your mood and making your treat even more enjoyable.
Step-by-Step Instructions
Now that we’ve covered the essential ingredients and their benefits, let’s move on to the step-by-step instructions for making your own No Bake Chocolate Peanut Butter Bars.
Step 1: Gather Your Ingredients
Before you start, gather all your ingredients to ensure a smooth preparation process. You will need:
– 1 cup of creamy peanut butter
– 1/2 cup of coconut oil, melted
– 1/4 cup of honey or maple syrup
– 2 cups of gluten-free oats
– 1/2 cup of almond flour
– 1/2 cup of unsweetened cocoa powder
– 1/2 cup of dark chocolate chips
Step 2: Prepare Your Pan
Line an 8×8-inch or 9×9-inch baking pan with parchment paper. This will prevent the bars from sticking and make it easier to remove them once set. Leave a slight overhang of parchment paper on the sides to help lift the bars out of the pan later.
Step 3: Mix the Wet Ingredients
In a large mixing bowl, combine the creamy peanut butter, melted coconut oil, and honey (or maple syrup). Use a spatula or whisk to mix these ingredients until they are well combined and smooth. This mixture will serve as the base for your bars.
Step 4: Combine the Dry Ingredients
In a separate bowl, mix together the gluten-free oats, almond flour, cocoa powder, and a pinch of salt. Ensure that the dry ingredients are evenly distributed before combining them with the wet mixture.
Step 5: Combine Wet and Dry Mixtures
Gradually add the dry ingredients to the bowl with the wet mixture. Stir gently until everything is well combined. The mixture should be thick and slightly sticky. If it’s too dry, you can add a little more melted coconut oil or a splash of water to help it come together.
Step 6: Fold in Dark Chocolate Chips
Once the mixture is well combined, fold in the dark chocolate chips, distributing them evenly throughout the mixture. This will add pockets of melty chocolate in each bite, enhancing the overall flavor of the bars.
Step 7: Press the Mixture into the Pan
Transfer the mixture into the prepared baking pan. Using a spatula or your hands, press the mixture firmly and evenly into the pan. Make sure the surface is smooth and compact to ensure the bars hold together once set.
Step 8: Chill the Bars
Place the pan in the refrigerator and allow the bars to chill for at least 2 hours, or until they are firm. Chilling is an essential step, as it allows the coconut oil to solidify and helps the bars maintain their shape.
Step 9: Cut and Serve
Once the bars are set, use the overhanging parchment paper to lift them out of the pan. Place them on a cutting board and slice into squares or rectangles, depending on your preference.
Enjoy your No Bake Chocolate Peanut Butter Bars as a nutritious snack or a delightful dessert. These bars are perfect for meal prep and can be stored in an airtight container in the fridge for up to a week.
By following these simple steps, you can create a delicious and healthy treat that everyone will love! Stay tuned for more tips and tricks that will help you make the most out of your no-bake dessert experience.
Detailed Breakdown of Each Step in the Recipe
Mixing the Base: Importance of Achieving a Smooth Consistency
The foundation of your No Bake Chocolate Peanut Butter Bars lies in the base mixture. To start, combine your rolled oats, nut butter (preferably peanut butter), and sweeteners like maple syrup or honey in a mixing bowl. Using a spatula or a large spoon, thoroughly mix the ingredients until they form a cohesive mass. Achieving a smooth consistency is crucial, as this will ensure that the bars hold together well once set. You may find it beneficial to use your hands to knead the mixture slightly, as this can help to fully incorporate all ingredients. If the mixture feels too dry or crumbly, a teaspoon of water or additional nut butter can help to bind it better.
Combining Dry Ingredients: Tips for Ensuring Even Distribution
For the dry ingredients, make sure to sift or whisk together your rolled oats, cocoa powder, and any additional spices or flavorings (like a pinch of salt or cinnamon). This step is vital for avoiding clumps and ensuring an even distribution of flavors throughout the bars. When adding these dry ingredients to your wet mixture, do so gradually. Stir gently but thoroughly, ensuring there are no dry pockets remaining. The goal is a homogeneous mixture that will provide a satisfying texture and flavor in every bite.
Preparing the Baking Dish: Best Practices for Easy Removal
To prevent sticking and make removal easier, line your baking dish with parchment paper before pouring in the mixture. Ensure that the parchment paper overhangs the edges of the dish; this will allow you to lift the bars out easily once they are set. If you prefer, you can lightly grease the dish with a bit of coconut oil or cooking spray before adding the parchment for extra security against sticking. Using a dish that’s 8×8 inches is ideal for this recipe, as it allows for the right thickness without being too cumbersome.
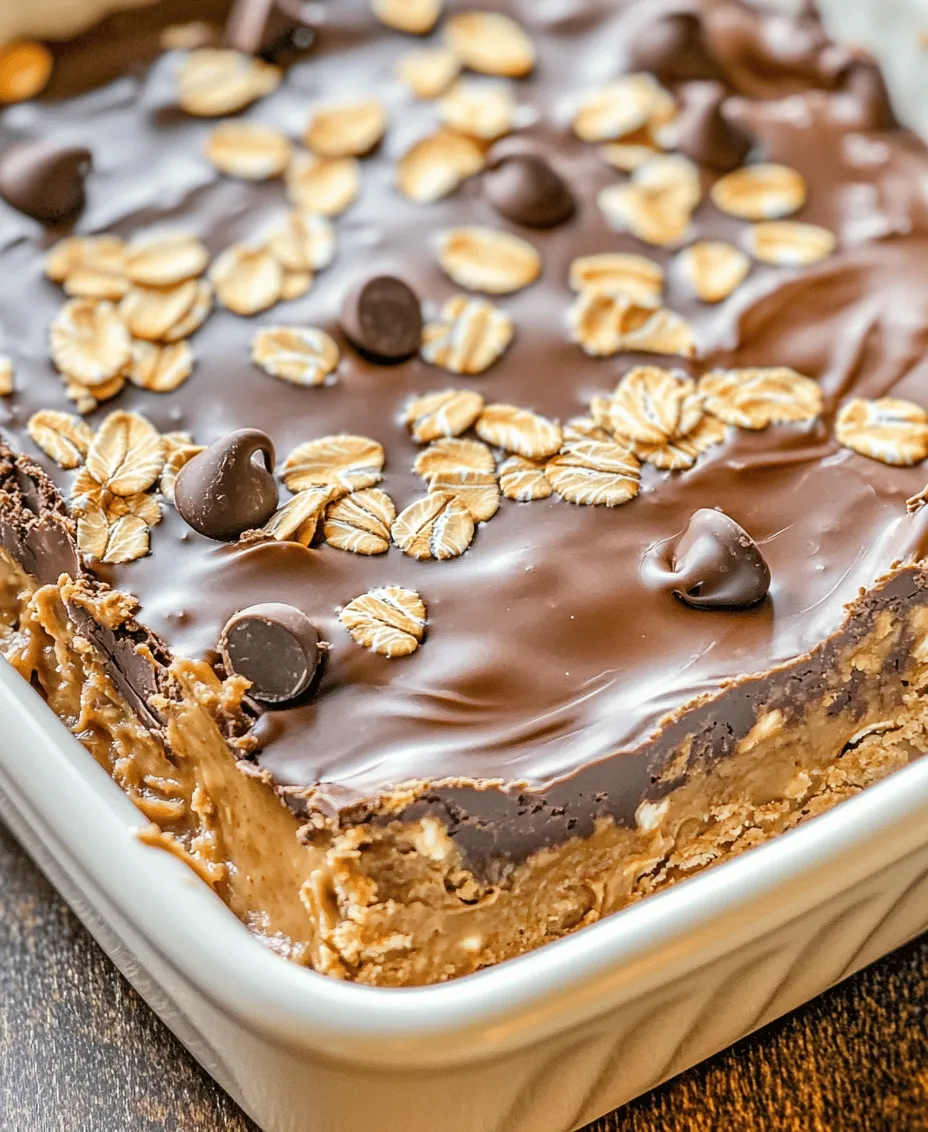
Melting Chocolate: Techniques for Avoiding Burns and Clumps
Melting chocolate is a delicate process, and to achieve that velvety smooth topping, you’ll want to use a double boiler or a microwave. If using a double boiler, fill the bottom pot with a couple of inches of water and bring it to a gentle simmer. Place a heatproof bowl on top, ensuring it doesn’t touch the water. Add your chocolate chips or chopped chocolate to the bowl, stirring occasionally until melted. If using a microwave, place the chocolate in a microwave-safe bowl and heat in 20-second intervals, stirring in between, until completely melted. This minimizes the risk of burning as chocolate can easily scorch. Once melted, allow it to cool slightly before pouring over your prepared base.
Setting the Bars: Ideal Refrigeration Time for Best Texture
Once you’ve poured the melted chocolate over the base mixture in the baking dish, use a spatula to spread it evenly across the surface. For the best results, refrigerate the bars for at least 1-2 hours. This time allows the chocolate to harden and the bars to set properly. You’ll know they’re ready when the chocolate is firm to the touch, and the overall structure feels solid. After setting, lift the bars out using the parchment overhang and cut them into squares or rectangles with a sharp knife.
Tips for Perfecting Your No Bake Bars
Common Pitfalls to Avoid When Making No-Bake Bars
While making No Bake Chocolate Peanut Butter Bars is relatively straightforward, there are a few common pitfalls to keep in mind. One major issue is under-mixing the base, which can lead to crumbly bars that fall apart. Additionally, ensuring that the chocolate melts properly without burning is crucial. If the chocolate is too thick when poured over the bars, it may not adhere well, so always ensure a smooth consistency before spreading.
Suggestions for Ingredient Substitutions
Flexibility is one of the great benefits of this recipe. If you’re not a fan of peanut butter, consider using almond butter, cashew butter, or sunflower seed butter. For a vegan version, ensure that you use a plant-based sweetener like agave syrup instead of honey. If you’re looking to cut back on sugar, you can substitute with a sugar-free sweetener of your choice; just be aware that this may alter the final texture slightly.
Ideas for Adding Mix-Ins
To personalize your No Bake Bars, think about incorporating mix-ins. Some delicious additions include dried fruits like cranberries or raisins, seeds such as chia or flaxseed for added nutrition, or even dark chocolate chips for extra richness. Nuts, whether chopped walnuts, almonds, or pecans, can provide a satisfying crunch. Just be sure not to overload the mixture, as this can affect the bars’ ability to hold together.
Storage and Shelf Life
Best Practices for Storing the Bars to Maintain Freshness
To keep your No Bake Chocolate Peanut Butter Bars fresh, store them in an airtight container in the refrigerator. This will help maintain their texture and flavor. If you plan on keeping them for longer than a week, consider wrapping each bar individually in plastic wrap before placing them in the container. This method helps prevent them from absorbing any odors from the fridge.
Discussion on the Shelf Life of the Bars and How to Tell if They’ve Gone Bad
When stored properly, these bars can last up to two weeks in the refrigerator. However, if you notice any off smells, changes in texture (such as a sticky or overly dry surface), or visible mold, it’s best to discard them. For longer storage, these bars can also be frozen. Just wrap them tightly in plastic wrap and place them in a freezer-safe container. They can last up to three months in the freezer, making them a convenient snack option for busy days.
Nutritional Information
Breakdown of Calories, Macronutrients, and Vitamins Per Serving
Each serving of these No Bake Chocolate Peanut Butter Bars provides a balanced source of energy, with approximately 200 calories, 10g of protein, 15g of carbohydrates, and 12g of healthy fats, depending on the specific ingredients used. They are also rich in fiber, which is beneficial for digestive health. The bars contain vitamins and minerals such as magnesium from the peanut butter and iron from the cocoa powder, making them a nutritious snack.
Analysis of How These Bars Fit into Various Dietary Lifestyles
These bars are naturally gluten-free and can easily be tailored to fit vegan diets with the right substitutions. They are also low in refined sugars if you opt for natural sweeteners. This versatility makes them suitable for a variety of dietary lifestyles, providing a wholesome snack that satisfies sweet cravings without compromising health.
Conclusion
No Bake Chocolate Peanut Butter Bars exemplify the perfect blend of simplicity and deliciousness. With easy preparation steps and the flexibility to customize ingredients, these bars are a fantastic option for anyone looking to enjoy a wholesome snack at home. Whether you’re snacking on them post-workout, enjoying them as a midday treat, or serving them as a dessert, they’re sure to be a hit.
Feel free to experiment with different nut butters, sweeteners, and mix-ins to create a version that perfectly suits your taste. The joy of making these bars lies not only in their delightful flavor but also in the satisfaction of creating easy, wholesome snacks that bring happiness with every bite.