

Introduction
Chicken tenders have long held a cherished spot on dinner tables and in restaurants alike, celebrated for their tender meat and satisfying crunch. Their versatility makes them a favorite among both children and adults, whether served as a casual weeknight dinner, a party appetizer, or a delightful addition to lunchboxes. While traditional chicken tenders are already a treat, adding a unique twist can elevate this beloved dish to new heights. Enter the honey garlic crispy chicken tenders—where succulent chicken meets a sweet and savory glaze that will tantalize your taste buds.
The combination of honey and garlic creates a flavor profile that is both comforting and exciting. Honey introduces a natural sweetness that balances beautifully with the robust flavor of garlic, enhancing the chicken without overwhelming it. This delightful pairing not only adds layers of flavor but also provides some health benefits, making it a guilt-free indulgence. The recipe is straightforward enough for novice cooks while also providing a satisfying experience for culinary enthusiasts. Whether you’re preparing it for a family meal, a game-day snack, or a cozy dinner with friends, these honey garlic chicken tenders are sure to impress.
The beauty of this recipe lies in its simplicity. With just a handful of ingredients and minimal preparation time, you can create a dish that feels gourmet. The crispy texture combined with the sticky honey garlic sauce creates an irresistible appeal that will have everyone coming back for seconds.
Understanding the Ingredients
To master the art of making honey garlic crispy chicken tenders, it’s essential to understand the role each ingredient plays in the dish. Let’s break down the key components that contribute to both flavor and texture.
Chicken Breast Tenders
At the heart of this recipe are chicken breast tenders, which are prized for their lean meat and tender texture. Unlike other cuts of chicken, tenders are naturally more tender and cook quickly, making them ideal for this dish. They are not only delicious but also a healthier option, being lower in fat and calories compared to darker meat. Chicken breast tenders are an excellent source of protein, essential for muscle growth and repair, and they contain important nutrients like niacin and selenium, which support overall health.
All-Purpose Flour and Breadcrumbs
The combination of all-purpose flour and breadcrumbs is crucial for achieving that coveted crispy exterior. The flour serves as the initial coating, providing a dry surface that helps the egg adhere better. When coated in breadcrumbs, the chicken tenders develop a crunchy texture that contrasts perfectly with the tender meat inside. For an extra layer of flavor and crunch, consider using panko breadcrumbs, which are coarser and create a lighter, crispier coating.
Eggs and Milk
Eggs mixed with milk form a wet batter that acts as the glue for the breadcrumbs. This mixture is vital in the breading process, ensuring that the breadcrumbs stick to the chicken and form a delicious crust during frying or baking. The proteins in the eggs help create a golden-brown color, while the milk adds moisture, ensuring the chicken remains juicy.
Honey and Garlic
The star of the show is undoubtedly the honey and garlic. Honey not only adds sweetness but also gives the chicken a beautiful glaze that caramelizes when cooked, providing a delightful stickiness that enhances the dish. Garlic, on the other hand, brings a savory depth, making each bite flavorful. Both ingredients offer health benefits; honey is known for its antioxidant properties and natural energy boost, while garlic is celebrated for its immune-boosting qualities and heart health benefits.
Soy Sauce and Apple Cider Vinegar
To deepen the flavor of the honey garlic sauce, soy sauce and apple cider vinegar are added. Soy sauce contributes umami richness that complements the sweetness of the honey, while apple cider vinegar adds a tangy brightness that balances the dish. Together, they create a harmonious blend that elevates the chicken tenders beyond the ordinary.
Selecting high-quality ingredients is essential for achieving the best results. Opt for fresh chicken and organic honey, if possible, to maximize flavor and health benefits. By prioritizing quality, you ensure that each bite of your honey garlic chicken tenders is both delicious and wholesome.
Preparation Steps for Perfect Chicken Tenders
Now that we’ve explored the ingredients, let’s move on to the preparation steps that will lead you to perfect honey garlic crispy chicken tenders.
Preparing the Chicken
The first step in preparing your chicken tenders is ensuring they are at their best. Start by rinsing the chicken tenders under cold water to remove any residual packaging juices. Pat them dry using paper towels; this step is crucial. Excess moisture on the chicken can lead to a soggy coating, preventing the tenders from achieving that desired crispy texture. Drying the chicken not only helps the breading adhere better but also allows for even cooking.
Setting Up a Breading Station
A well-organized breading station will make the preparation process smoother and more efficient. Here’s how to set it up:
1. Gather Your Materials: You’ll need three shallow dishes—one for the all-purpose flour, one for the egg mixture, and one for the breadcrumbs. It’s also helpful to have a large plate or baking sheet ready for the breaded chicken tenders.
2. Prepare the Egg Mixture: In one of the shallow dishes, crack a few eggs and whisk them together with a splash of milk until combined. This will create a smooth, cohesive mixture that will coat the chicken tenders evenly.
3. Season the Flour: In the second dish, add the all-purpose flour. To enhance the flavor, consider seasoning the flour with salt, pepper, and any other desired spices, such as paprika or garlic powder.
4. Breadcrumbs: In the last dish, pour in the breadcrumbs. If you’re using panko, you can mix in some grated Parmesan cheese for added flavor and crunch.
5. Maintain Cleanliness: As you prepare, keep in mind the importance of cleanliness. Designate one hand for the dry ingredients (flour and breadcrumbs) and the other for the wet ingredients (egg mixture). This method will help prevent clumping and maintain an organized workspace.
By setting up a proper breading station, you’ll streamline the process and make it more enjoyable. Plus, it allows you to focus on achieving that perfect coating without unnecessary mess.
Tips for Maintaining Cleanliness and Organization
– Use Separate Utensils: Have separate tongs or forks for each station to avoid cross-contamination and keep your hands clean.
– Prepare Ahead: Before you start breading, make sure everything is ready to go. This includes having your frying oil heated and your cooking surface set up.
– Clean as You Go: Keep a damp cloth nearby to wipe up any spills or crumbs as you work. This will help prevent a chaotic cleanup after cooking.
By following these preparation steps, you’ll set the foundation for creating beautifully crispy and flavorful honey garlic chicken tenders.
Breading Chicken Tenders: Techniques for Success
Once your chicken is prepped and your breading station is ready, it’s time to delve into the breading process. This step is crucial for achieving that irresistible crunch.
The Dredging Process
The dredging process involves three main steps: coating in flour, dipping in the egg mixture, and finally, rolling in breadcrumbs. Here’s how to do it effectively:
1. Coat in Flour: Start by taking a chicken tender and lightly dredging it in the flour. Ensure it is evenly coated, shaking off any excess flour. This first layer creates a barrier that helps the egg adhere.
2. Dip in Egg Mixture: Next, dip the floured chicken tender into the egg mixture, making sure it is fully coated. Allow any excess egg to drip off before moving to the next step.
3. Roll in Breadcrumbs: Finally, place the chicken tender in the breadcrumbs. Gently press down to help the breadcrumbs stick, ensuring an even coating. For an extra crunchy texture, you can double-dip by repeating the egg and breadcrumb steps once more.
Common Mistakes to Avoid While Breading Chicken
– Skipping the Drying Step: Failing to dry the chicken before breading can result in a soggy coating. Always start with dry chicken.
– Overcrowding: Avoid overcrowding the breading station or the frying pan. This can lead to uneven cooking and a less crispy texture.
– Inadequate Coating: Ensure each chicken tender is fully coated in flour, egg, and breadcrumbs. Incomplete coating will lead to uneven textures and flavors.
– Not Preheating Oil: If frying, make sure your oil is preheated to the correct temperature. If the oil is not hot enough, the coating can absorb excess oil, resulting in greasy tenders.
Achieving the Perfect Coating for Maximum Crunch
For the ultimate crispy coating, consider these tips:
– Use Panko Breadcrumbs: Panko provides a lighter, crunchier texture compared to traditional breadcrumbs. They create an airy coating that crisps up beautifully.
– Fry in Batches: If frying, cook the tenders in small batches to ensure they have enough space to cook evenly. This prevents steaming and promotes a crispy finish.
– Let Them Rest: After breading, allow the chicken tenders to rest on a wire rack for about 10-15 minutes. This helps the coating adhere better and enhances the crispiness when cooked.
– Baking Option: If you prefer a healthier method, consider baking the chicken tenders. Place them on a baking sheet lined with parchment paper, spray lightly with cooking oil, and bake at 400°F (200°C) until golden brown and cooked through.
With these techniques in place, you’re well on your way to crafting the most delicious honey garlic crispy chicken tenders imaginable. The next steps will involve bringing all the flavors together and cooking the tenders to perfection, but for now, you have established a solid foundation for a mouthwatering dish. Stay tuned for the next part, where we’ll delve into the cooking process and finish this delectable recipe.
Crafting the Honey Garlic Sauce
One of the stars of the Honey Garlic Crispy Chicken Tenders recipe is undoubtedly the honey garlic sauce. This sauce not only elevates the flavor of the chicken but also adds a sticky sweetness that is irresistible. The combination of honey, garlic, and soy sauce creates a perfect balance of sweet and savory, ensuring that each bite is packed with flavor.
Step-by-Step Instructions for Making the Sauce
To make the honey garlic sauce, follow these simple steps:
1. Gather Your Ingredients: You will need ½ cup of honey, ¼ cup of soy sauce (preferably low sodium), 3-4 cloves of minced garlic, and 1 tablespoon of cornstarch mixed with 1 tablespoon of water (this will act as a thickening agent).
2. Combine Ingredients: In a small saucepan, combine the honey, soy sauce, and minced garlic. Stir the mixture well to ensure that the honey and soy sauce blend smoothly.
3. Simmer the Sauce: Place the saucepan over medium heat and bring the mixture to a gentle simmer. Allow it to cook for about 5-7 minutes, stirring occasionally. This simmering process helps to enhance the flavors and infuse the garlic into the sauce.
4. Thickening the Sauce: After simmering, add the cornstarch slurry (cornstarch mixed with water) to the saucepan. Stir constantly for about 1-2 minutes until the sauce thickens. If you prefer a thicker sauce, you can add more cornstarch slurry.
5. Taste and Adjust: Taste the sauce and adjust the flavor as needed. You can add a bit more honey for sweetness or soy sauce for a saltier kick, depending on your preference.
Variations of the Sauce
While the classic honey garlic sauce is delicious on its own, you can easily adapt it to suit your taste:
– Spicy Honey Garlic Sauce: To add a kick of heat, consider incorporating red pepper flakes or a splash of hot sauce into the mixture. This will give your sauce a spicy kick that pairs wonderfully with the crispy chicken tenders.
– Ginger Honey Garlic Sauce: For a different flavor profile, add freshly grated ginger to the sauce. The ginger complements the garlic and honey beautifully, creating a zesty twist.
– Citrusy Honey Garlic Sauce: A squeeze of fresh lime or lemon juice can brighten the sauce and add a refreshing tang. This variation works well in warmer months or when you want a lighter sauce.
Frying Techniques for Crispy Chicken Tenders
Frying chicken tenders is an art, and there are two primary methods you can use: deep frying and pan frying. Both methods can yield delicious results, but they differ in technique and oil usage.
Overview of Frying Methods
– Deep Frying: This method involves submerging the chicken tenders in hot oil. Deep frying typically results in a more even and crispy coating, but it requires more oil and can be messier.
– Pan Frying: In contrast, pan frying uses less oil and requires you to turn the chicken tenders more frequently. This method is perfect for those who want a slightly healthier option while still achieving a crispy texture.
Detailed Instructions for Frying Chicken Tenders to Perfection
1. Prepare the Oil: In a deep skillet or a deep fryer, heat about 2 to 3 inches of oil to 350°F (175°C). Use a thermometer to ensure the oil reaches the right temperature. This is crucial for achieving that crispy exterior.
2. Fry the Chicken Tenders: Working in batches, carefully place the breaded chicken tenders into the hot oil. Avoid overcrowding the pan, as this can lower the oil temperature and result in soggy tenders. Fry for about 3-4 minutes per side, or until golden brown and cooked through.
3. Check for Doneness: The chicken tenders are done when they reach an internal temperature of 165°F (75°C). You can use a meat thermometer to check. Additionally, the tenders should be golden brown and crispy on the outside.
4. Drain Excess Oil: Once cooked, carefully remove the chicken tenders from the oil and place them on a plate lined with paper towels to drain excess oil. This step is important for maintaining their crispiness.
Glazing and Serving the Chicken Tenders
After frying, it’s time to glaze the chicken tenders in the honey garlic sauce. This step is key to infusing the chicken with flavor and adding that shiny, appetizing appearance.
Techniques for Tossing Chicken in the Honey Garlic Sauce
1. Combine the Chicken and Sauce: In a large mixing bowl, add the fried chicken tenders. Drizzle the honey garlic sauce over the tenders.
2. Toss Gently: Using tongs or a spatula, gently toss the chicken tenders until they are evenly coated in the sauce. Be careful not to break the tenders; a light touch goes a long way.
Suggestions for Plating and Presentation
When serving your Honey Garlic Crispy Chicken Tenders, presentation matters. Here are some ideas for making your dish visually appealing:
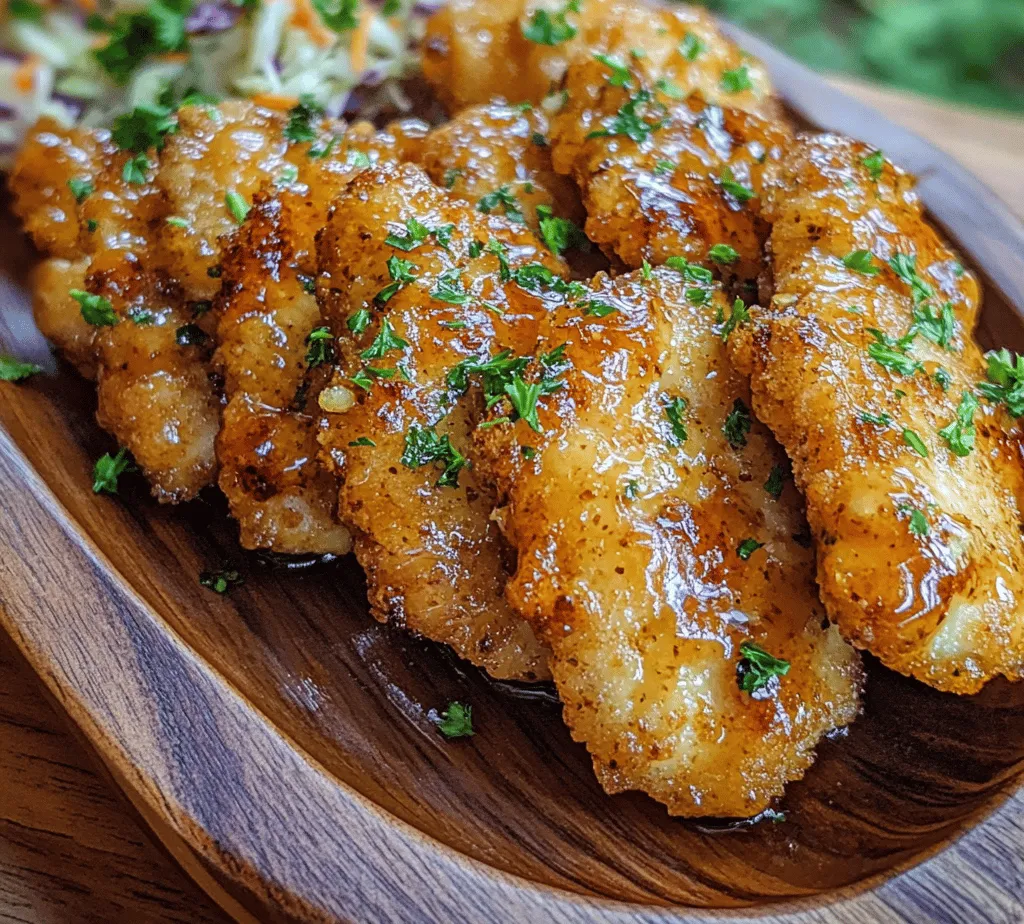
– Garnish with Sesame Seeds: Sprinkle toasted sesame seeds on top of the glazed chicken tenders for added texture and flavor.
– Add Fresh Herbs: A sprinkle of chopped green onions or fresh cilantro can brighten the dish and add a pop of color.
– Serve with Dipping Sauce: Consider serving extra honey garlic sauce on the side for dipping, along with a creamy ranch or blue cheese dressing for a delightful contrast.
Recommended Side Dishes that Complement the Tenders
To create a well-rounded meal, pair your chicken tenders with complementary side dishes. Here are a few suggestions:
– Coleslaw: A refreshing, crunchy coleslaw is a perfect balance to the sweetness of the honey garlic sauce and adds a crisp texture.
– Sweet Potato Fries: The natural sweetness of sweet potato fries pairs beautifully with the honey garlic chicken. You can bake or fry them for a delicious side.
– Steamed Vegetables: A side of steamed broccoli or green beans can add a healthy touch to your meal while providing a vibrant color contrast.
Nutrition Analysis of Honey Garlic Crispy Chicken Tenders
Understanding the nutritional profile of your meals can help you make informed choices. Here’s a breakdown of the nutritional value of the Honey Garlic Crispy Chicken Tenders per serving (based on a typical recipe serving size):
– Calories: Approximately 350-400 calories
– Protein: 25-30 grams
– Carbohydrates: 30-35 grams
– Fat: 15-20 grams
– Fiber: 1-2 grams
Balancing Indulgent Meals with Health-Conscious Choices
While these chicken tenders are a delicious indulgence, it’s essential to consider how they fit into a balanced diet. Here are some tips for enjoying this dish without the guilt:
– Portion Control: Serve smaller portions alongside healthier sides to create a balanced plate.
– Healthier Cooking Methods: If you want to reduce fat and calories, consider baking the chicken tenders instead of frying. Simply coat them in the same breading and bake at 400°F (200°C) for about 20-25 minutes, flipping halfway through.
– Add More Vegetables: Incorporate more vegetables into your meal to increase fiber and nutrients while balancing the richness of the chicken.
Conclusion
The Honey Garlic Crispy Chicken Tenders recipe is a crowd-pleaser that combines the irresistible crunch of fried chicken with a sweet and savory glaze that entices the taste buds. With its simple yet flavorful ingredients and straightforward preparation, this dish is perfect for family dinners, gatherings, or any occasion where delicious food is a must.
As you embark on this culinary adventure, remember to savor each step of the cooking process. The joy of cooking home-cooked meals lies not only in the final dish but also in the memories created along the way. We encourage you to try this recipe and indulge in the delightful flavors of honey garlic chicken tenders. Whether enjoyed on their own or paired with your favorite sides, these tenders are sure to become a favorite in your home. Happy cooking!
