Introduction
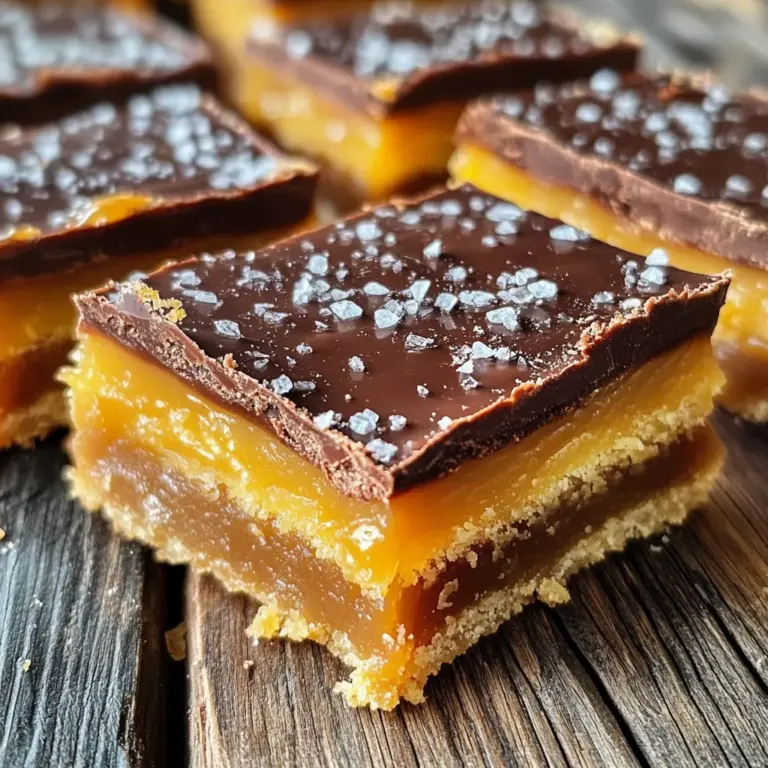
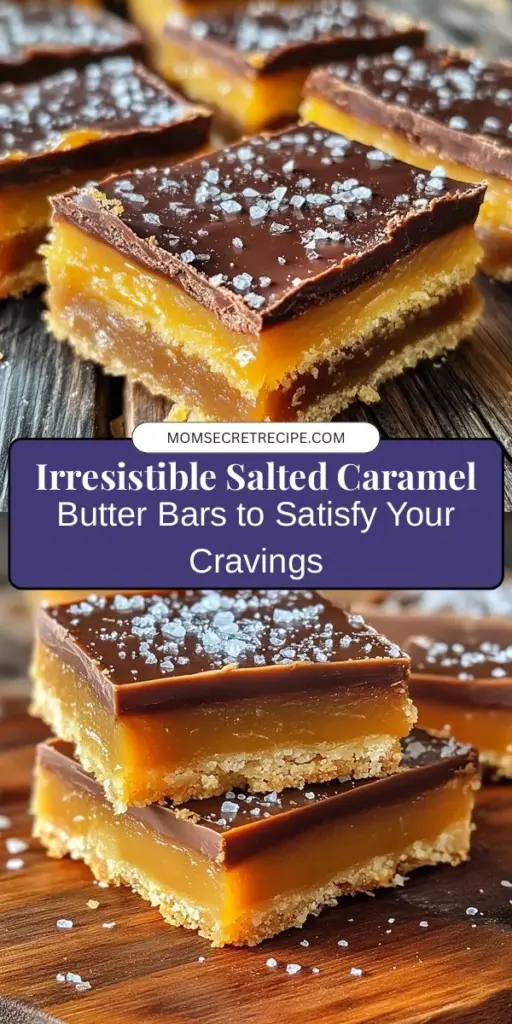
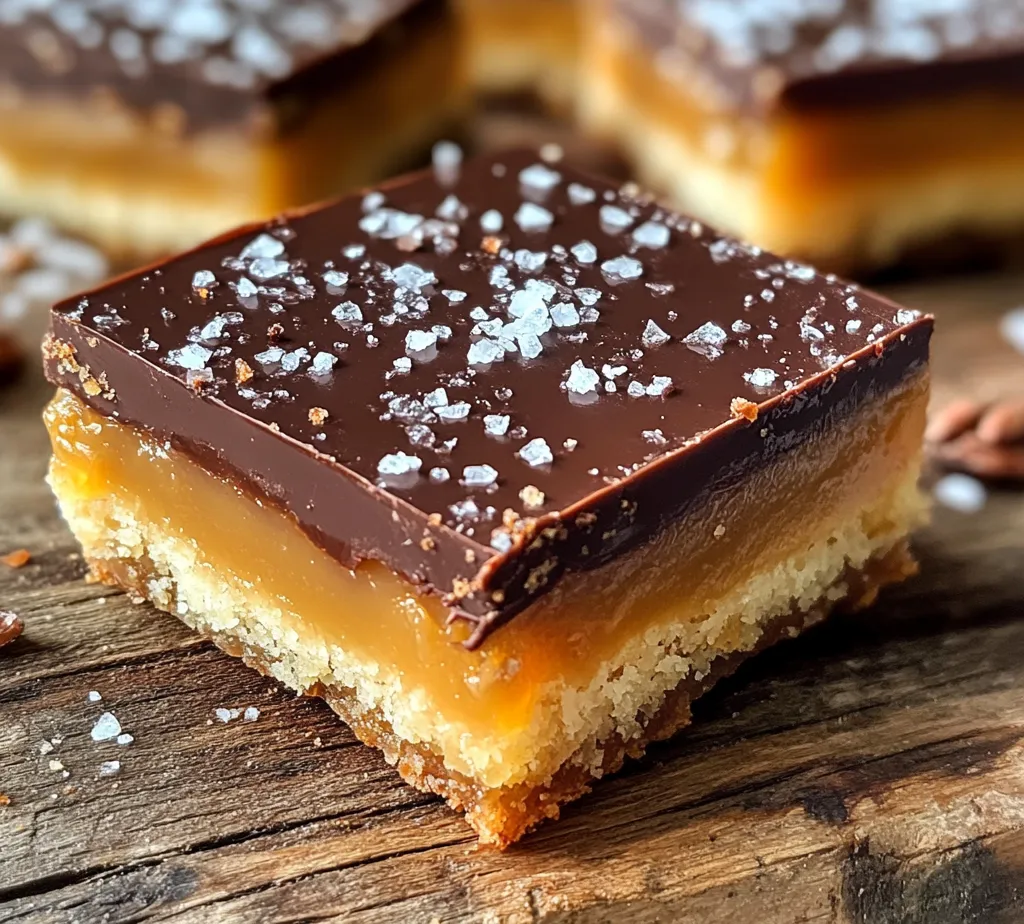
In the world of desserts, few combinations are as captivating as the blend of sweet and salty. Salted caramel has garnered a devoted following, delighting taste buds everywhere with its rich flavor profile and comforting texture. Among the myriad of salted caramel treats, one recipe stands out: Salted Caramel Butter Bars. These bars not only encapsulate the essence of salted caramel but also offer a delectable buttery crust that creates a perfect harmony of flavors.
What makes Salted Caramel Butter Bars a must-try is the way they balance indulgence with a touch of sophistication. The buttery base is complemented by a luscious layer of salted caramel, creating a sweet treat that appeals to dessert lovers of all ages. Each bite delivers a satisfying crunch from the crust, followed by a creamy, melt-in-your-mouth caramel, finished with a hint of sea salt that elevates the entire experience. It’s no wonder that these bars have become a favorite for gatherings, celebrations, or even a quiet night in.
The Allure of Salted Caramel
Salted caramel didn’t just appear out of nowhere; it has a rich history that traces back to France. While caramel has long been a beloved confection, the intentional addition of salt began to gain traction in the culinary world in the late 20th century. This innovative twist transformed a classic dessert into something extraordinary, and salted caramel quickly became a staple in patisseries and restaurants around the globe.
So, what is it about the combination of sweet and salty that resonates so deeply? The answer lies in our taste buds. Sweetness activates our pleasure receptors, while salt enhances flavors and provides contrast. By marrying these two elements, salted caramel strikes a perfect balance that excites the palate, creating a dessert experience that is both satisfying and complex. This duality makes it a versatile flavor that pairs wonderfully with various ingredients, from chocolate to nuts, and even fruits.
To achieve the best flavor in your salted caramel butter bars, the quality of your ingredients is paramount. Using fresh, high-quality components can make a significant difference in the final product. For instance, opting for artisanal sea salt can enhance the overall flavor profile, while fresh cream can elevate the richness of your caramel layer. The right choice of ingredients not only impacts taste but also contributes to the texture, which is essential in creating the perfect salted caramel experience.
Understanding the Ingredients
Before diving into the baking process, it’s essential to understand the role each ingredient plays in creating these mouthwatering Salted Caramel Butter Bars. Here’s a breakdown of what you’ll need:
For the Crust
1. Unsalted Butter: The foundation of the crust, unsalted butter adds richness and flavor. Using unsalted allows you to control the amount of salt in your dessert more precisely.
2. Granulated Sugar: This ingredient is crucial for sweetness and helps to create a tender texture in the crust.
3. Brown Sugar: Adding brown sugar not only enhances the flavor with its caramel notes but also contributes to moisture in the crust.
4. All-Purpose Flour: The main structure of the crust, flour gives the bars their form. It’s important to measure accurately to avoid a dense texture.
5. Salt: A pinch of salt in the crust complements the sweetness and balances the flavors.
For the Caramel Layer
1. Brown Sugar: The star ingredient in the caramel layer, brown sugar provides a deep, rich flavor and helps create a smooth texture when combined with cream.
2. Heavy Cream: Essential for achieving that luscious, gooey caramel, heavy cream adds richness and a creamy texture that makes this layer irresistibly decadent.
3. Sea Salt: The finishing touch, sea salt not only enhances the flavor of the caramel but also adds a delightful contrast to the sweetness.
For Topping
1. Chocolate Chips: Choosing between dark or milk chocolate chips is a matter of personal preference. Dark chocolate provides a more intense flavor that pairs excellently with the sweetness of the caramel, while milk chocolate offers a creamier, sweeter finish.
Understanding these ingredients is crucial, as they each contribute to the overall flavor and texture of the bars. When it comes to sourcing ingredients, consider visiting local farmers’ markets or specialty food stores to find high-quality options. Fresh, organic butter, premium chocolate, and artisanal sea salt can elevate your Salted Caramel Butter Bars from ordinary to extraordinary.
Step-by-Step Guide to Making Salted Caramel Butter Bars
Now that you’re familiar with the ingredients, it’s time to roll up your sleeves and get baking! Follow this step-by-step guide to create your very own Salted Caramel Butter Bars.
Preheating the Oven and Preparing the Baking Pan
Start by preheating your oven to 350°F (175°C). This ensures that your bars bake evenly and thoroughly. While the oven is heating up, prepare your baking pan. Line an 8×8-inch square baking pan with parchment paper, leaving some overhang on the sides. This will make it easier to lift the bars out of the pan once they’re cooled. Lightly grease the parchment paper with cooking spray or butter to prevent sticking.
Preparing the Crust
Next, it’s time to make the crust. In a large mixing bowl, begin by creaming together the unsalted butter and both sugars—granulated and brown—using an electric mixer on medium speed. Creaming is a crucial step that creates a light and airy texture in the crust. Aim for a light and fluffy consistency, which usually takes about 2-3 minutes.
Once the butter and sugars are well combined, add in the salt and mix until incorporated. Gradually add the all-purpose flour to the mixture, mixing on low speed until just combined. Be careful not to overmix, as this can lead to a tough crust. The mixture should come together into a crumbly dough.
Baking the Crust
Transfer the crust mixture into the prepared baking pan and press it evenly across the bottom. You can use your fingers or the back of a measuring cup to ensure an even layer. It’s essential to press firmly so that the crust holds together during baking.
Place the pan in the preheated oven and bake for about 15-20 minutes, or until the edges are lightly golden and the center feels set. Keep an eye on it to avoid overbaking, as the crust can become too dry if left in the oven too long. Once done, remove the crust from the oven and allow it to cool slightly while you prepare the caramel layer.
The Importance of Creaming Butter and Sugar Properly
As you prepare your crust, remember that the creaming process is vital not only for texture but also for flavor development. Properly creamed butter and sugar aerate the mixture, creating little pockets of air that help the crust rise slightly during baking. This results in a tender, flaky base that beautifully contrasts with the rich caramel layer.
Mixing Dry and Wet Ingredients Efficiently
Once the crust is out of the oven and slightly cooled, it’s time to focus on the caramel. In a medium saucepan over medium heat, combine the brown sugar and heavy cream. Stir constantly until the mixture comes to a gentle boil. This step is crucial to ensure that the sugar dissolves properly and prevents any crystallization. Once boiling, reduce the heat to low and continue to stir for an additional 2-3 minutes until the mixture thickens slightly.
After the caramel has thickened, remove it from the heat and stir in the sea salt. Taste the mix to ensure the saltiness is to your preference; remember, you can always add a bit more if desired. Pour the hot caramel over the cooled crust, spreading it evenly with a spatula.
Baking the Bars: What to Look For in Doneness
Once the caramel is spread over the crust, return the pan to the oven and bake for an additional 15-20 minutes. You’ll know the bars are done when the caramel layer is bubbling and slightly darker in color. Allow the bars to cool in the pan for at least 30 minutes before lifting them out using the parchment paper overhang.
This cooling step is essential as it allows the caramel to set properly, ensuring clean cuts when you slice the bars. Once cooled, you can refrigerate them for a firmer texture, making them easier to slice into perfect squares.
As you embark on making these Salted Caramel Butter Bars, remember that the journey is just as enjoyable as the destination. The aroma of caramel wafting through your kitchen and the anticipation of that first bite will make the effort worthwhile. Stay tuned for the next part of this article, where we will delve into the finishing touches and tips for achieving the perfect salted caramel treat!
Crafting the Caramel: Tips for Success
Creating the perfect salted caramel is an art that requires patience and precision. To begin, choose a heavy-bottomed saucepan to ensure even heat distribution, which helps prevent burning. Use a combination of granulated sugar and light corn syrup, as the corn syrup helps to prevent crystallization during the cooking process.
When melting the sugar, keep the heat on medium. It’s crucial to stir the sugar gently at first, ensuring all granules dissolve before letting it boil. Once the mixture starts to bubble, stop stirring altogether to allow the caramel to develop its rich flavor without interference. Use a candy thermometer to monitor the temperature; aim for a range between 320°F to 340°F for the ideal caramel consistency.
Importance of Stirring and Boiling Techniques
Stirring is essential at the beginning stages of caramel preparation. Once the sugar has fully melted and reached a golden amber color, it’s crucial to watch it closely, as it can quickly go from perfect to burnt in seconds. Boiling techniques also play a key role; maintain a steady boil to achieve a deep, complex flavor. If your caramel seems to be cooking unevenly, gently swirl the pan to redistribute the heat, but avoid direct stirring to prevent crystallization.
How to Achieve the Right Consistency
To ensure your caramel reaches the desired consistency, you will need to pay attention to the timing and temperature. After reaching the target temperature, remove the pan from the heat and carefully add your butter and cream. The mixture will bubble vigorously, so it’s crucial to stand back to avoid splatters. Stir the caramel until the butter has melted completely and the mixture is smooth. If you desire a thicker caramel, allow it to cool to room temperature before using it in your bars. For a thinner consistency, use it while still warm.
Assembling the Bars: Layering Techniques for Even Distribution
Once your caramel is prepared, it’s time to assemble the salted caramel butter bars. Begin by pouring the warm caramel over the baked crust, ensuring even coverage. Use a spatula to gently coax the caramel to the edges, filling any gaps. A good tip is to tilt the pan slightly to let the caramel flow into the corners.
Allow the caramel to set for a few minutes before adding the chocolate topping. This step is vital as it prevents the chocolate from sinking into the caramel, disrupting the layers. Ensure that the caramel is not too hot when you add the chocolate, as this can result in a melty, messy situation.
Melting and Spreading the Chocolate Topping: Methods for Best Results
For the chocolate topping, use high-quality chocolate chips or a chocolate bar, chopped into small pieces. Melting can be done using a double boiler or in the microwave. If using the microwave, heat the chocolate in 30-second intervals, stirring in between to avoid burning. Once melted, pour the chocolate over the cooled caramel layer and use an offset spatula to spread it evenly.
For a polished finish, consider creating a marbled effect by swirling the chocolate with a toothpick or a skewer. This not only adds visual appeal but also enhances the flavor experience with pockets of chocolate throughout the bars.
The Role of Finishing Touches: Why Sprinkling Sea Salt Enhances the Dish
Sprinkling flaky sea salt over the warm chocolate layer is the finishing touch that elevates these salted caramel butter bars. The contrast between the sweet chocolate and the salt enhances the overall flavor profile, making each bite more satisfying. Use a light hand when applying the salt; a little goes a long way. Opt for high-quality sea salt, which adds a burst of flavor and a delightful crunch.
Baking Tips for Perfect Salted Caramel Butter Bars
Common Pitfalls to Avoid During Preparation
– Burnt Caramel: Watch the sugar closely to avoid burning. If it starts to smell bitter, it’s time to start over.
– Crystallization: Avoid stirring the caramel once it begins to boil, as this can lead to grainy texture.
– Overbaking the Crust: Keep an eye on the crust to ensure it turns golden but doesn’t become too dark, which can affect the flavor.
Alternative Ingredients for Different Dietary Needs
If you have dietary restrictions, there are several alternatives you can explore:
– Gluten-Free: Substitute all-purpose flour with a 1:1 gluten-free baking blend.
– Dairy Alternatives: Use coconut cream or almond milk in place of heavy cream and plant-based butter for a vegan version.
Storage Tips for Maintaining Freshness and Flavor
To keep your salted caramel butter bars fresh, store them in an airtight container at room temperature for up to five days. For longer storage, refrigerate them, where they can last up to two weeks. If you prefer a softer texture, allow them to come to room temperature before serving. You can also freeze the bars for up to three months; simply wrap them tightly in plastic wrap and place them in a freezer-safe container.
Serving Suggestions and Pairings
Ideas for Serving the Bars
When it comes to presentation, consider cutting the bars into uniform squares or rectangles for a clean look. Place them on a decorative platter, and for an elegant touch, garnish with a drizzle of melted chocolate or caramel. You can also dust them lightly with additional sea salt or cocoa powder for a sophisticated flair.
Beverages that Complement the Salted Caramel Flavor
Pairing beverages with your salted caramel butter bars can enhance the tasting experience. A cup of freshly brewed coffee or espresso complements the chocolate and caramel beautifully. For a lighter option, a glass of cold milk provides a classic pairing. If you want to indulge further, consider dessert wines like a sweet Riesling or a rich Port, which will echo the flavors in the bars.
Creative Ways to Present the Bars for Gatherings or Special Occasions
For gatherings, consider using individual dessert cups with a layer of crushed bars topped with whipped cream for a more refined serving style. Alternatively, create a dessert table featuring the bars alongside other treats, enhancing the visual appeal and providing guests with a variety of flavors to enjoy.
Nutritional Information
A serving of salted caramel butter bars typically contains approximately:
– Calories: 250
– Total Fat: 12g
– Saturated Fat: 7g
– Cholesterol: 30mg
– Sodium: 80mg
– Carbohydrates: 36g
– Fiber: 1g
– Sugar: 20g
– Protein: 2g
While these bars are indulgent, moderation is key. The combination of butter, sugar, and chocolate creates a rich treat that is best enjoyed in small portions. Ingredients like butter provide energy, while dark chocolate can offer antioxidants, making these bars a delightful treat that doesn’t completely derail a balanced diet.
Conclusion
The Salted Caramel Butter Bars are a luxurious treat that beautifully marries sweet and salty flavors, creating a memorable dessert experience. With their rich layers of buttery crust, luscious caramel, and creamy chocolate topping, these bars are sure to impress at any gathering or provide a comforting indulgence at home.
Baking is not just about creating desserts; it’s about crafting memories and sharing joy with those you love. We encourage you to try this recipe and experience the delightful flavors firsthand. Whether for a special occasion, a holiday gathering, or simply to satisfy a sweet tooth, these salted caramel butter bars are bound to become a favorite in your household. Happy baking!
