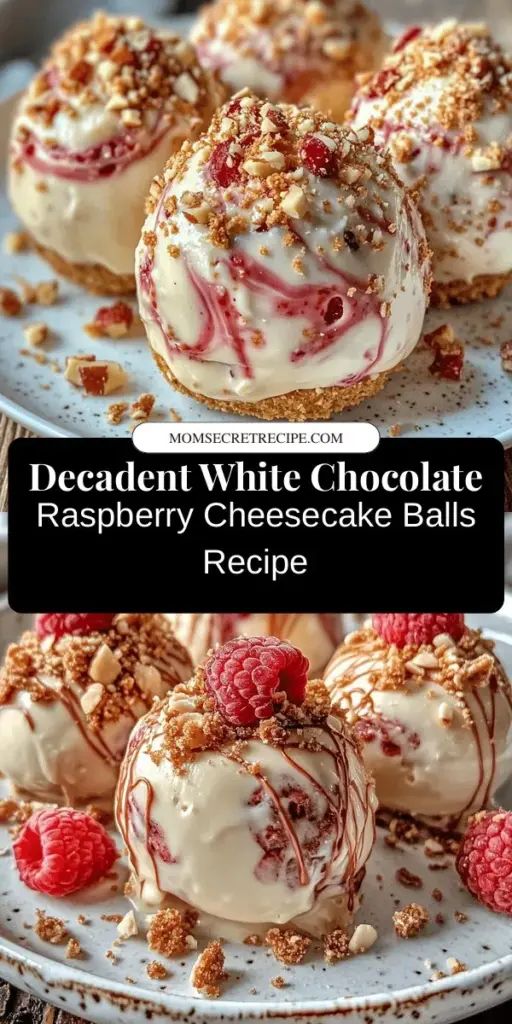
Introduction
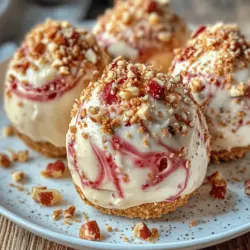
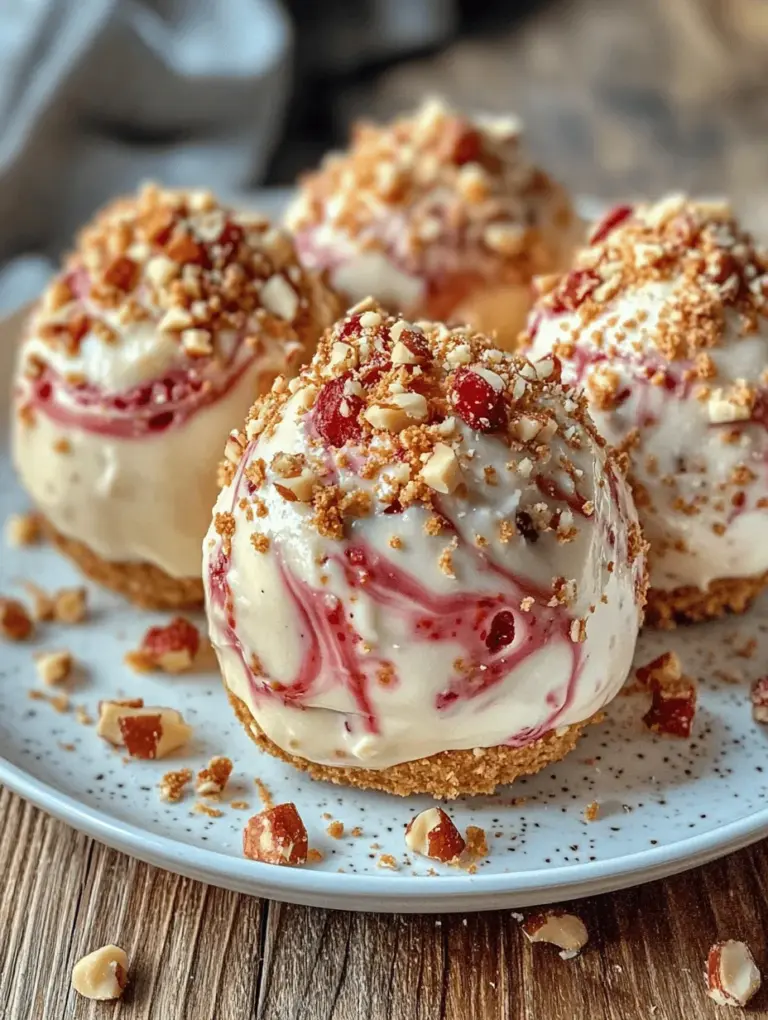
Indulging in a sweet treat is one of life’s simple pleasures, and few desserts can compare to the delightful experience of white chocolate raspberry cheesecake balls. These bite-sized morsels are a perfect fusion of creamy cheesecake and the tantalizing tartness of fresh raspberries, all enveloped in a luxurious white chocolate coating. Whether you’re celebrating a special occasion or simply craving a decadent dessert to satisfy your sweet tooth, these cheesecake balls are sure to impress.
The allure of cheesecake balls lies not only in their heavenly flavor combination but also in their versatility. They make a stunning centerpiece for dessert tables at parties, weddings, or holiday gatherings, and their easy-to-handle form means guests can enjoy them without the need for plates or forks. Plus, they can be made ahead of time and stored in the fridge or freezer, making them a convenient choice for busy bakers looking to impress.
Join us as we delve into the world of these delightful treats, exploring the quality ingredients that make them so special and guiding you through the steps to create your own delicious batch.
Understanding the Ingredients
To achieve the perfect balance of flavors and textures in white chocolate raspberry cheesecake balls, it’s crucial to understand the role of each ingredient involved in the recipe. Here’s a closer look at the primary components:
Cream Cheese
The star of this recipe is undoubtedly the cream cheese, which forms the base of the cheesecake mixture. A rich and creamy dairy product, it provides the smooth and velvety texture that cheesecake lovers adore. To ensure a seamless blending process, it’s essential to soften the cream cheese before use. This can be accomplished by leaving it at room temperature for about 30 minutes or microwaving it for a few seconds—just be cautious not to overheat it.
Powdered Sugar
Adding sweetness and a fine texture, powdered sugar is used in this recipe to sweeten the cheesecake mixture. Its ultra-fine granules dissolve quickly, ensuring a smooth blend without graininess. The amount of sugar can be adjusted based on your personal preference or the tartness of the raspberries you use.
Vanilla Extract
A splash of vanilla extract enhances the overall flavor profile of the cheesecake balls. This aromatic ingredient brings warmth and depth, elevating the taste of the cream cheese and complementing the sweetness of the sugar. Opt for pure vanilla extract for the best flavor, as artificial varieties can lack the complexity of natural extracts.
Graham Crackers
Crushed graham crackers serve as the foundation for the cheesecake balls, providing a delightful crunch and structure. They add a subtle sweetness and a hint of toasty flavor that pairs beautifully with the creamy filling. When preparing the cheesecake mixture, the graham crackers need to be finely crushed to ensure even distribution throughout the mixture.
Raspberries
Fresh raspberries are the key to introducing a burst of tartness that perfectly balances the richness of the white chocolate and cream cheese. Their vibrant color adds visual appeal, and their natural sweetness enhances the overall flavor of the cheesecake balls. When selecting raspberries, opt for firm, plump berries that are free of blemishes for the best results.
White Chocolate
The coating of these cheesecake balls is made from white chocolate, which provides a sweet, creamy exterior. White chocolate complements the flavors of the raspberries and cream cheese and adds a luxurious touch to each bite. For a smooth coating, choose high-quality white chocolate that melts easily.
Coconut Oil
While coconut oil is optional, it can be added to the melted white chocolate to create a smoother and more fluid coating. This is especially helpful if you find that your white chocolate is too thick for easy dipping. The gentle coconut flavor can also enhance the overall taste of the dessert.
Importance of Ingredient Quality
Using high-quality ingredients is essential for achieving the best results in this recipe. The flavors will be more pronounced, and the textures will be more appealing. Fresh raspberries, premium white chocolate, and pure vanilla extract can make a significant difference in the final outcome. Remember, when it comes to baking, the quality of your ingredients can elevate your dish from good to extraordinary.
Step-by-Step Guide to Making Cheesecake Balls
Now that we’ve covered the essential ingredients, let’s dive into the detailed steps for making your own decadent white chocolate raspberry cheesecake balls. Follow this guide to ensure a successful and enjoyable cheesecake-making experience.
Step 1: Prepare the Cheesecake Mixture
Begin by gathering all your ingredients and tools. This includes your softened cream cheese, powdered sugar, vanilla extract, crushed graham crackers, and fresh raspberries. It’s helpful to have a mixing bowl and an electric mixer on hand, although you can also mix by hand if you prefer.
– Soften the Cream Cheese: If you haven’t already softened your cream cheese, do so now. Cut it into chunks and place it in your mixing bowl. Using an electric mixer, beat the cream cheese until it becomes smooth and creamy, about 2-3 minutes.
– Add Sugar and Vanilla: Gradually add the powdered sugar and vanilla extract to the cream cheese, mixing on low speed until well combined. Scrape down the sides of the bowl as needed to ensure everything is incorporated.
Step 2: Incorporate the Graham Crackers
Next, it’s time to add the crushed graham crackers to the mixture. These will give your cheesecake balls structure and a delightful crunch.
– Mix in Graham Crackers: Gently fold the crushed graham crackers into the cheesecake mixture using a spatula. Be careful not to overmix, as this can lead to a denser texture. You want just enough mixing to combine the ingredients thoroughly.
Step 3: Add the Raspberries
Now for the fun part—adding the raspberries! This step will add a burst of color and flavor to your cheesecake balls.
– Fold in Raspberries: Carefully fold in the fresh raspberries, being mindful not to crush them too much. You want to maintain some whole pieces for texture and visual appeal. The raspberries will also release some juice, which will further enhance the flavor of the cheesecake mixture.
Step 4: Chill the Mixture
Once you have a well-combined cheesecake mixture, it’s time to chill it to help it firm up before shaping.
– Chill the Mixture: Cover the mixing bowl with plastic wrap and place it in the refrigerator for at least 30 minutes. Chilling helps the mixture become more manageable for rolling into balls and allows the flavors to meld together.
Step 5: Form the Cheesecake Balls
After chilling, you’re ready to shape your cheesecake balls. This step is essential for achieving the perfect bite-sized treats.
– Scoop and Roll: Using a small cookie scoop or your hands, scoop out small portions of the cheesecake mixture, about 1 inch in diameter. Roll each scoop into a ball, ensuring they are compact and uniform in size. Place the formed balls on a baking sheet lined with parchment paper.
– Chill Again: Once all the balls are formed, return the baking sheet to the refrigerator for an additional 30 minutes. This final chill will help them retain their shape when coated in chocolate.
Step 6: Prepare the White Chocolate Coating
While the cheesecake balls are chilling, it’s time to prepare the white chocolate coating. This is where the indulgence truly comes into play.
– Melt the White Chocolate: In a microwave-safe bowl, combine the white chocolate and optional coconut oil. Microwave in 30-second increments, stirring between each interval until the chocolate is completely melted and smooth. Be cautious not to overheat, as white chocolate can scorch easily.
– Cool Slightly: Allow the melted chocolate to cool for a few minutes before using it for dipping. This will help prevent the cheesecake balls from melting when they come into contact with the warm chocolate.
Step 7: Coat the Cheesecake Balls
With your cheesecake balls chilled and your white chocolate ready, it’s time for the final assembly.
– Dip the Balls: Using a fork or a toothpick, dip each cheesecake ball into the melted white chocolate, ensuring they are fully coated. Allow any excess chocolate to drip off before placing them back on the parchment-lined baking sheet.
– Chill to Set: Once all the balls are coated, return them to the refrigerator for about 15-20 minutes to allow the chocolate coating to set.
By following these initial steps closely, you’re setting yourself up for a truly indulgent treat that’s sure to be a hit at any gathering. The combination of creamy cheesecake, tart raspberries, and sweet white chocolate is a match made in dessert heaven, and soon, you’ll be able to enjoy these delightful bites of bliss. Stay tuned for the next part of the recipe, where we’ll explore the finishing touches and some helpful tips to ensure your cheesecake balls are perfect every time.
Adding Raspberries: Techniques for Gentle Mixing
Incorporating raspberries into your cheesecake mixture can be an exciting yet delicate process. To ensure that you maintain the integrity of the raspberries while achieving a balanced flavor throughout your cheesecake balls, it’s crucial to follow a few techniques for gentle mixing. Start by rinsing the raspberries under cold water and patting them dry with a paper towel. This helps remove any excess moisture that could affect the texture of your cheesecake balls.
When adding the raspberries to your cheesecake mixture, opt for a folding technique instead of vigorous stirring. Use a spatula to gently lift and fold the mixture over the raspberries, ensuring that they are evenly distributed without breaking apart. This gentle approach preserves the beautiful shape of the fruit, allowing for bursts of tart flavor in every bite. Combine the raspberries until just mixed; over-mixing can lead to a monochrome filling instead of the delightful pink swirls you desire.
Forming the Balls: Tips for Uniform Sizes and Shapes
Now that your cheesecake mixture is complete, it’s time to transform it into delightful balls. For uniform sizes and shapes, consider using a small cookie scoop or an ice cream scoop. This will allow you to portion out the mixture consistently, ensuring that each cheesecake ball is the same size. If you prefer a more hands-on approach, you can use your hands to roll the mixture into balls; however, keeping a consistent size can be tricky.
Before you start rolling, wet your hands with a little water or cooking spray; this will prevent the mixture from sticking to your palms. Take a scoop of the cheesecake mixture and gently roll it between your palms to form a smooth ball. Aim for about one inch in diameter; this size is perfect for a bite-sized treat. Once all the balls are formed, place them on a parchment-lined baking sheet, ensuring they are spaced apart to allow for easy coating later on.
Chilling the Mixture: Why Chilling is Essential for Texture
Chilling the mixture is an essential step in achieving the perfect texture for your cheesecake balls. After forming the balls, cover the baking sheet with plastic wrap and refrigerate for at least 30 minutes. This chilling time allows the balls to firm up, making them easier to coat later on. If you skip this step, you may find that the balls are too soft and difficult to handle, resulting in a messy coating process.
The cool temperature also helps to enhance the flavors as they meld together during the chilling process. The raspberries will release their natural juices, which will infuse the cheesecake mixture with delightful tartness. After chilling, the balls will have a firmer texture, making them a pleasure to eat.
Melting and Coating the Cheesecake Balls
Techniques for Melting White Chocolate Effectively
Coating your cheesecake balls in white chocolate is what transforms them into a decadent treat. To melt white chocolate effectively, begin by chopping it into small, even pieces. This ensures that the chocolate melts uniformly, minimizing the risk of burning.
The best method for melting white chocolate is to use a double boiler setup. Fill a saucepan with a couple of inches of water and bring it to a gentle simmer. Place a heatproof bowl on top, making sure it doesn’t touch the water. Add your chopped white chocolate to the bowl and stir occasionally until melted. This method provides a consistent and gentle heat that prevents scorching.
If you prefer to use a microwave, break the chocolate into small chunks and place it in a microwave-safe bowl. Heat the chocolate in short intervals of 20-30 seconds, stirring in between. This approach is crucial for preventing the chocolate from burning, which can happen quickly due to its high sugar content.
Importance of Microwave Intervals to Prevent Burning
When using the microwave, patience is key. White chocolate can easily go from melted to burnt in a matter of seconds. By melting in short intervals and stirring frequently, you allow the residual heat to continue melting the chocolate without the risk of overheating. This ensures a smooth, creamy texture that’s perfect for coating your cheesecake balls.
Using Coconut Oil for a Smoother Coating
To achieve a glossy and smooth coating, consider adding a teaspoon of coconut oil to your melted white chocolate. The coconut oil helps thin the chocolate, making it easier to dip the cheesecake balls without thick clumps forming. Plus, the subtle coconut flavor complements the white chocolate and raspberry beautifully.
Coating the Cheesecake Balls: Best Practices for Even Coverage
Once your chocolate is melted and smooth, it’s time to coat the cheesecake balls. Using a fork or a dipping tool, dip each ball into the melted chocolate, ensuring it is fully submerged. Allow any excess chocolate to drip off before placing the coated ball back onto the parchment-lined baking sheet. For a more controlled approach, you can use a toothpick to dip the balls, allowing you to maneuver them without getting too messy.
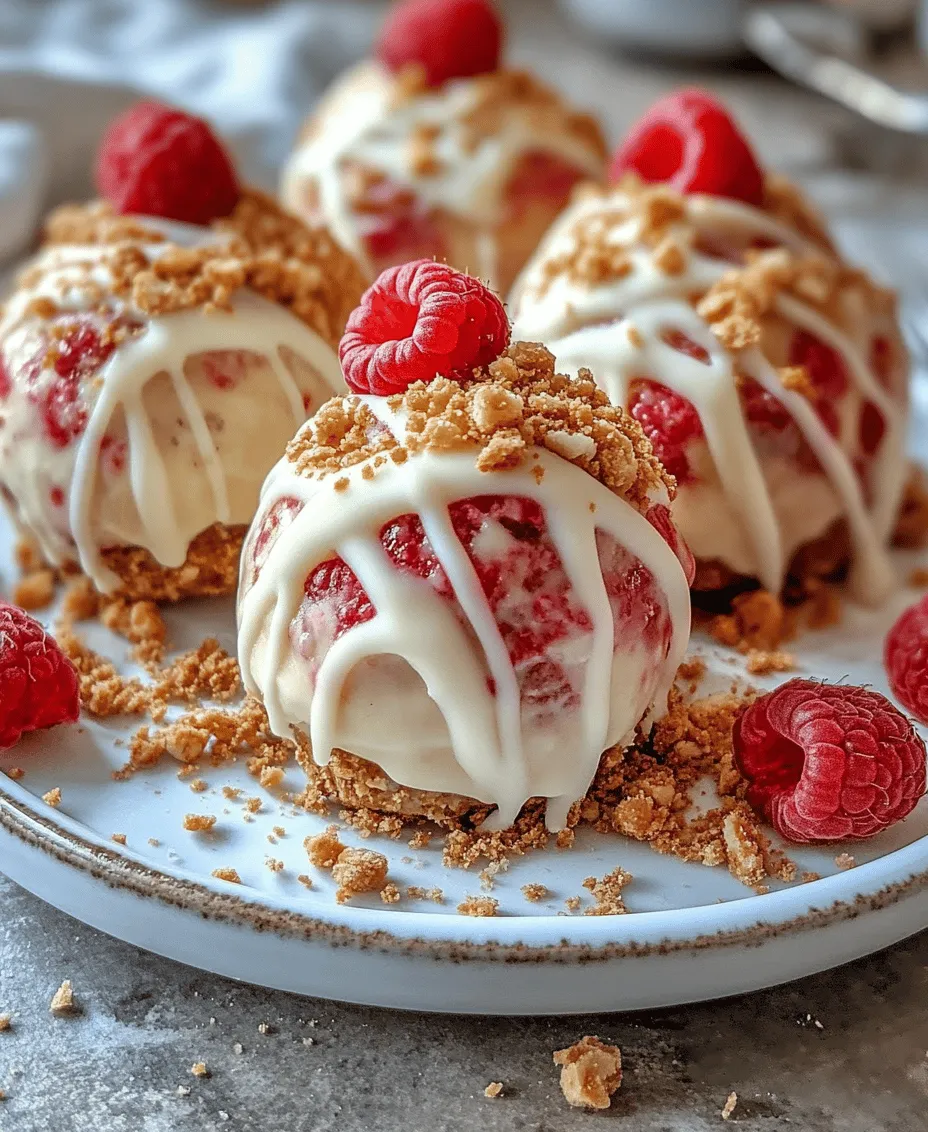
To ensure even coverage, you can also use a spoon to drizzle chocolate over the top of the balls after dipping. This technique allows for a decorative finish that enhances the visual appeal of your dessert.
Optional Coating Variations: Ideas for Using Crushed Graham Crackers or Nuts
For a fun twist on the traditional coating, consider rolling your cheesecake balls in crushed graham crackers or finely chopped nuts before the chocolate sets. This adds an additional layer of texture and flavor and makes for a beautiful presentation. Crushed graham crackers give a nod to the classic cheesecake crust, while nuts like almonds or pistachios can add a delightful crunch and a hint of nuttiness.
Setting and Serving Suggestions
Importance of Chilling After Coating for Setting the Chocolate
After coating your cheesecake balls in white chocolate, it’s important to allow them to set properly. Place the coated balls back in the refrigerator for about 30 minutes, or until the chocolate is firm. This chilling time not only helps the chocolate to harden but also allows the flavors to mingle, resulting in a more cohesive taste experience.
Presentation Ideas for Serving
When it comes to serving your white chocolate raspberry cheesecake balls, presentation can elevate the overall experience. Consider placing the balls in decorative mini cupcake liners for a charming display. Arrange them on a platter, or use a tiered dessert stand to create an eye-catching centerpiece for your table. Drizzle some extra melted chocolate over the top for visual appeal, or sprinkle a bit of edible glitter for a festive touch.
Serving at Parties, Holidays, or as Gifts
These cheesecake balls are versatile and perfect for various occasions. They make an ideal addition to dessert tables at parties, holidays, or family gatherings. You can also package them in a decorative box or jar to create a thoughtful homemade gift for friends or loved ones. The delightful combination of flavors will surely impress anyone who receives them.
Pairing Suggestions with Drinks or Other Desserts
To enhance the experience, consider pairing your cheesecake balls with complementary beverages. A glass of sparkling wine or champagne can beautifully balance the sweetness of the cheesecake, while a cup of rich coffee or espresso can provide a delightful contrast. For an indulgent dessert platter, serve the cheesecake balls alongside fresh fruit, such as strawberries or blueberries, and a scoop of vanilla ice cream for an extra touch of decadence.
Nutritional Information and Serving Size
Breakdown of Approximate Nutritional Values per Serving
While these cheesecake balls are certainly a treat, it’s helpful to be aware of their nutritional values. Each cheesecake ball contains approximately 120 calories, with 8 grams of fat, 10 grams of carbohydrates, and 2 grams of protein. The exact values may vary based on the specific ingredients and portion sizes used, so consider this a general guideline.
Discussion on Portion Control and Moderation
Although these cheesecake balls are delicious, moderation is key. They are rich and satisfying, so one or two balls can be a delightful treat without overindulging. If you’re serving them at a gathering, consider offering smaller sizes or encouraging guests to take just one to enjoy the flavors without going overboard.
Conclusion
In summary, these decadent white chocolate raspberry cheesecake balls are a delightful combination of rich white chocolate, creamy cheesecake, and tangy raspberries. The process of making them is straightforward and rewarding, allowing you to create a stunning dessert that will impress family and friends. From the gentle mixing of fresh raspberries to the smooth coating of white chocolate, every step contributes to the final delicious result.
With their versatility for various occasions and the ability to pair beautifully with other desserts or drinks, these cheesecake balls are sure to become a favorite in your dessert repertoire. So gather your ingredients, follow the steps, and indulge in the delightful flavors and textures of this unique treat!