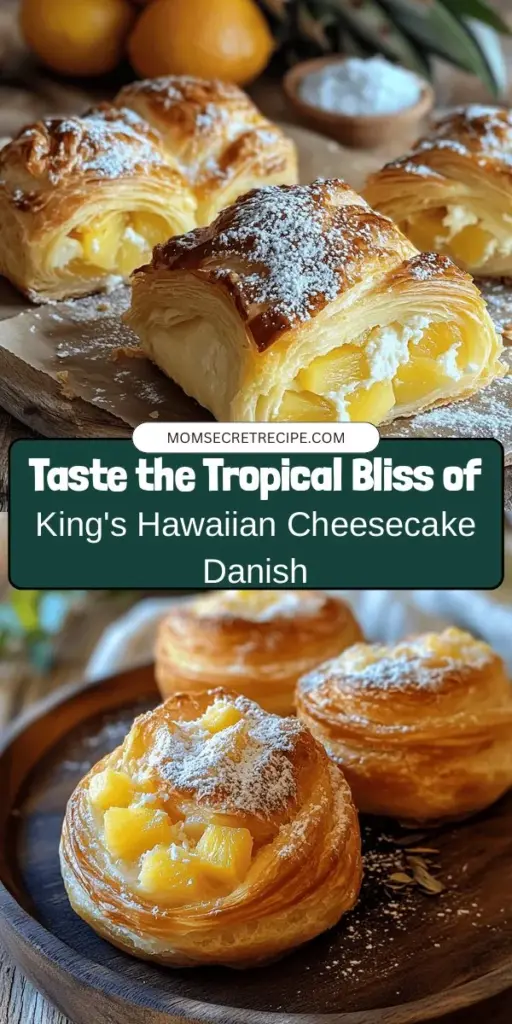
When it comes to satisfying your sweet tooth, few desserts can rival the delightful fusion of creamy cheesecake and sweet Hawaiian bread found in the King’s Hawaiian Cheesecake Danish. This innovative treat combines the rich, luscious flavors of cream cheese and pineapple with the unique texture of King’s Hawaiian sweet bread, resulting in a mouthwatering dessert that’s perfect for brunch or a special occasion. Whether you’re hosting a gathering or simply indulging in a personal treat, this recipe will surely impress your family and friends.
In this article, we’ll guide you through the ingredients, preparation steps, and tips for achieving the perfect Danish, while also delving into the history and versatility of this delicious dish. As we explore the captivating flavors and textures of the King’s Hawaiian Cheesecake Danish, you’ll discover how this dessert has become a staple for many dessert lovers.
The Allure of Hawaiian Sweet Bread
Understanding the Unique Flavor Profile
At the heart of the King’s Hawaiian Cheesecake Danish lies the beloved King’s Hawaiian sweet bread. Known for its soft, fluffy texture and subtly sweet flavor, this bread serves as the perfect canvas for the rich cheesecake filling. The sweetness of the bread complements the creamy filling, creating a delightful contrast that elevates this dessert to new heights.
King’s Hawaiian sweet bread has its origins in Hawaii, where it was first introduced by Robert Taira in 1950. After perfecting his recipe for a traditional Hawaiian bread, he eventually founded the King’s Hawaiian Bakery. The bread quickly gained popularity not only in Hawaii but across the mainland United States as well. Its unique taste and texture have made it a favorite for various applications, from sandwiches to French toast, and now, as the base for our Danish.
Culturally, Hawaiian bread holds significant importance in Hawaiian cuisine. It is often enjoyed during celebrations, luaus, and family gatherings. Its rise in popularity has made it accessible in grocery stores nationwide, allowing more people to experience the deliciousness of this sweet bread.
How Hawaiian Sweet Bread Enhances the Danish Experience
The sweetness and texture of King’s Hawaiian sweet bread stand out when compared to traditional Danish dough. Traditional Danish pastries are known for their flaky layers and buttery richness. In contrast, the sweet bread offers a pillowy softness that absorbs the flavors of the cheesecake filling beautifully. This creates a harmonious balance where each bite is filled with creamy sweetness and a tender, sweet bread texture.
When paired with cheesecake flavors, the King’s Hawaiian sweet bread becomes an irresistible combination. The creamy filling, infused with hints of vanilla and pineapple, melds perfectly with the sweet, airy bread. This dessert not only satisfies your sweet cravings but also transports you to a tropical paradise with every bite.
Ingredients Breakdown
To create the perfect King’s Hawaiian Cheesecake Danish, we need to gather a few essential ingredients. Each component plays a crucial role in achieving the desired flavor and texture. Here’s a breakdown of what you’ll need:
Essential Ingredients for the Cheesecake Filling
1. Cream Cheese: The star of the filling, cream cheese provides a rich and creamy base. For best results, opt for full-fat cream cheese to achieve a smooth and velvety texture. Make sure it’s softened to room temperature for easy mixing.
2. Granulated Sugar: This ingredient adds sweetness to the filling and helps create the right consistency. The sugar dissolves into the cream cheese, ensuring a smooth batter.
3. Vanilla Extract: A splash of vanilla enhances the overall flavor of the cheesecake filling. Using pure vanilla extract will yield the best results, offering a rich and aromatic essence.
4. Egg: The egg is essential for binding the filling together. It adds structure and creaminess to the cheesecake. For optimal results, separate the yolk and white, as the yolk will add richness while the white can be whipped for a lighter texture.
Key Components of the Danish Base
1. King’s Hawaiian Sweet Bread: The foundation of our Danish, this sweet bread provides the unique flavor and texture that sets this dessert apart. Its soft and slightly sweet nature makes it the perfect vehicle for the cheesecake filling.
2. Shredded Coconut: Adding shredded coconut to the Danish base introduces a tropical flavor and a delightful texture. Opt for unsweetened coconut to avoid overpowering the sweetness of the dish.
3. Crushed Pineapple: Pineapple is a key ingredient in the filling, offering natural sweetness and a refreshing flavor. Be sure to drain the crushed pineapple thoroughly to prevent excess moisture in the filling.
4. Ground Cinnamon and Salt: These ingredients are crucial for balancing the flavors. Cinnamon adds warmth and depth, while salt enhances the overall taste of the cheesecake.
Step-by-Step Instructions for Making King’s Hawaiian Cheesecake Danish
Now that we have our ingredients ready, it’s time to dive into the preparation process. Creating the King’s Hawaiian Cheesecake Danish involves a few essential steps that will ensure your dessert turns out perfectly.
Preparation and Preheating
Before you begin, it’s essential to prepare your workspace and preheat the oven. Preheating the oven to 350°F (175°C) ensures that your Danish bakes evenly and achieves that golden-brown color we all love. Additionally, line a baking sheet with parchment paper to prevent sticking and make cleanup easier.
Mixing the Cheesecake Filling
To create a smooth and creamy cheesecake filling, start by beating the softened cream cheese in a large mixing bowl until it’s light and fluffy. This may take a few minutes, so be patient. Once the cream cheese is well-beaten, gradually add in the granulated sugar, mixing until fully incorporated.
Next, add the vanilla extract and egg yolk to the mixture. Beat until everything is well combined, and then gently fold in the crushed pineapple and shredded coconut. Be careful not to overmix, as you want to maintain the light texture of the filling.
If you like, you can also incorporate additional flavors at this stage, such as a splash of coconut extract or a dash of lemon zest, to enhance the tropical essence of your Danish.
Creating the Danish Base
With your filling prepared, it’s time to work on the King’s Hawaiian sweet bread. Begin by flattening the sweet bread to create a suitable base for your cheesecake filling. You can use a rolling pin to gently roll out the bread, but be cautious not to flatten it too much; you want to maintain some of its airy texture.
Once flattened, cut the sweet bread into rectangles. The ideal size for each rectangle will depend on how big you’d like your Danish to be. A good rule of thumb is to aim for pieces about 3×4 inches, which allows for a generous amount of filling while still being manageable to eat.
With your rectangles cut, you’re almost ready to assemble your King’s Hawaiian Cheesecake Danish. The next steps will guide you through the assembly and baking process, ensuring you achieve that perfect Danish experience. Stay tuned for more delicious details in the next part of this recipe article!

Assembling the Danish
When it comes to assembling the King’s Hawaiian Cheesecake Danish, precision and care are key to achieving that perfect, beautiful pastry. Follow these steps to fill and seal your Danish successfully, ensuring that no delicious filling spills out during baking.
Filling and Sealing Techniques: Ensuring No Spills
1. Prepare Your Filling: Start by mixing your cream cheese, sugar, vanilla extract, and egg in a bowl until smooth. This filling should be thick but spreadable.
2. Cutting the Dough: Roll out your King’s Hawaiian dough into a rectangle. Cut the dough into squares or rectangles, depending on your preferred serving size. Each piece should be about 4-5 inches wide.
3. Adding the Filling: Place a generous dollop of the cheesecake filling in the center of each dough square. Be careful not to overfill, as this can cause the filling to spill out during baking.
4. Sealing the Edges: Fold the corners of the dough over the filling, creating a pinwheel effect. Use a fork to press down on the edges to seal them securely. This not only helps prevent any leakage but also adds a decorative touch.
5. Egg Wash: Before baking, brush the tops of the assembled Danish with an egg wash (a mixture of beaten egg and a splash of water). This will give your pastries a beautiful golden color and help them shine.
Decorative Options for a Unique Presentation
To elevate the visual appeal of your King’s Hawaiian Cheesecake Danish, consider these decorative options:
– Sprinkle with Cinnamon Sugar: Before baking, sprinkle a mixture of cinnamon and sugar on top for an extra layer of flavor and crunch.
– Drizzle with Glaze: After baking and cooling, drizzle a simple glaze made from powdered sugar and milk over the top. This adds sweetness and an attractive finish.
– Garnish with Fresh Fruits: Top your Danish with fresh pineapple chunks, berries, or a sprig of mint for a pop of color that complements the tropical theme.
Baking the Danish
Now that your Danish is assembled and beautifully decorated, it’s time to bake them to perfection.
Baking Time and Temperature Considerations
Preheat your oven to 375°F (190°C). Place your assembled Danish on a parchment-lined baking sheet, allowing a little space between each piece to ensure even baking. Bake for about 20-25 minutes or until they are golden brown and puffed.
Recognizing When the Danish is Done
The Danish is done baking when the tops are a rich golden-brown color, and they have a delightful aroma wafting through your kitchen. You can also check the filling; it should be set but still slightly soft in the center. If you’re unsure, you can use a toothpick to check the filling—if it comes out clean, your Danish is ready to be removed from the oven.
Cooling and Dusting
After the baking process, it’s crucial to allow your Danish to cool properly.
Importance of Cooling Before Serving
Let the King’s Hawaiian Cheesecake Danish cool on a wire rack for at least 10-15 minutes. This cooling period allows the filling to set further and makes it easier to handle when serving. Serving them too hot could lead to spills and messy bites.
Dusting with Powdered Sugar: Presentation Tips
Once cooled, dust the Danish lightly with powdered sugar using a sifter. This not only adds a touch of sweetness but also enhances the visual appeal, making your Danish look professionally crafted. For extra flair, consider adding a pinch of cocoa powder or cinnamon to the powdered sugar for a unique twist.
Serving Suggestions and Pairings
Best Ways to Enjoy King’s Hawaiian Cheesecake Danish
The King’s Hawaiian Cheesecake Danish can be enjoyed in various ways, enhancing its appeal for any occasion.
– Serving Warm Versus Chilled: While warm Danish offers a delightful gooey filling, chilling them in the refrigerator for an hour creates a firmer texture that some may prefer. Experiment with both temperatures to find your favorite.
– Pairing with Coffee, Tea, or Tropical Juices: This Danish pairs wonderfully with a hot cup of coffee or tea, providing a balance to the richness of the cheesecake filling. For a tropical twist, offer it alongside fresh fruit juices like pineapple or mango.
Creative Serving Ideas
– Using the Danish as a Brunch Centerpiece: Arrange a platter of King’s Hawaiian Cheesecake Danish as the centerpiece of your brunch table. Their vibrant appearance and rich flavors will surely impress your guests.
– Incorporating Seasonal Fruits or Sauces: Serve the Danish with a side of seasonal fruit or a berry compote. A drizzle of passion fruit sauce or a tropical fruit salsa can elevate the dish and provide a refreshing contrast to the creamy filling.
Storage Tips for Leftovers
If you find yourself with leftovers (which is rare), here are the best practices to ensure they stay fresh.
How to Properly Store Danish
– Best Practices for Refrigeration: Store any leftover Danish in an airtight container in the refrigerator. They will stay fresh for about 3-4 days. To maintain their texture, consider separating layers with parchment paper to prevent sticking.
– Freezing Options for Extended Freshness: If you want to keep your Danish for longer, you can freeze them. Wrap each Danish tightly in plastic wrap and place them in a freezer-safe bag. They can be frozen for up to 2 months. When ready to enjoy, simply thaw in the refrigerator overnight.
Reheating Techniques
To ensure the texture remains optimal when reheating, follow these tips:
– Oven Reheating: Preheat your oven to 350°F (175°C). Place the Danish on a baking sheet and heat for about 10-15 minutes, or until warmed through. This method helps retain the crispy exterior.
– Microwave Reheating: If you’re short on time, you can use the microwave. Heat each Danish for about 15-20 seconds. However, be cautious, as microwaving can make the pastry soggy.
Exploring Variations of the Danish
The King’s Hawaiian Cheesecake Danish is versatile, allowing for fun variations to suit your preferences or dietary needs.
Customizing the Filling
– Alternative Fruits and Flavorings: Consider swapping the traditional cream cheese filling for flavored options, such as lemon zest, coconut, or even chocolate. You can also experiment with different fruit fillings, like mango, or guava, to create a tropical twist.
– Dairy-Free or Vegan Adaptations: For a dairy-free version, substitute regular cream cheese with a plant-based alternative and use a flax egg instead of a regular egg. Coconut milk can also be used to add creaminess to the filling.
Experimenting with the Bread
– Using Different Sweet Breads or Pastries: Try making your Danish with other sweet breads, like brioche or even puff pastry, for different textures and flavors. Each type of bread will give a unique twist to the classic Danish.
– Other Cultural Twists on the Classic Danish: Explore international variations by incorporating flavors from different cuisines. For example, you might add a hint of cardamom for a Scandinavian touch or utilize matcha for a Japanese-inspired flavor.
Conclusion: Embrace the Delight of King’s Hawaiian Cheesecake Danish
The King’s Hawaiian Cheesecake Danish is a delectable treat that brings together tropical flavors and a unique texture, making it a standout recipe for any occasion. Whether you’re serving it at a brunch gathering or enjoying it as a sweet snack, this Danish is sure to impress with its combination of flavors and visual appeal. Dive into this culinary adventure and savor the deliciousness that this recipe has to offer. With its rich cream cheese filling, fluffy pastry, and endless possibilities for customization, the King’s Hawaiian Cheesecake Danish is destined to become a cherished favorite in your baking repertoire.